Setting up Webhooks in Rocketlane
How to create webhooks in Rocketlane?
Access Rocketlane Settings
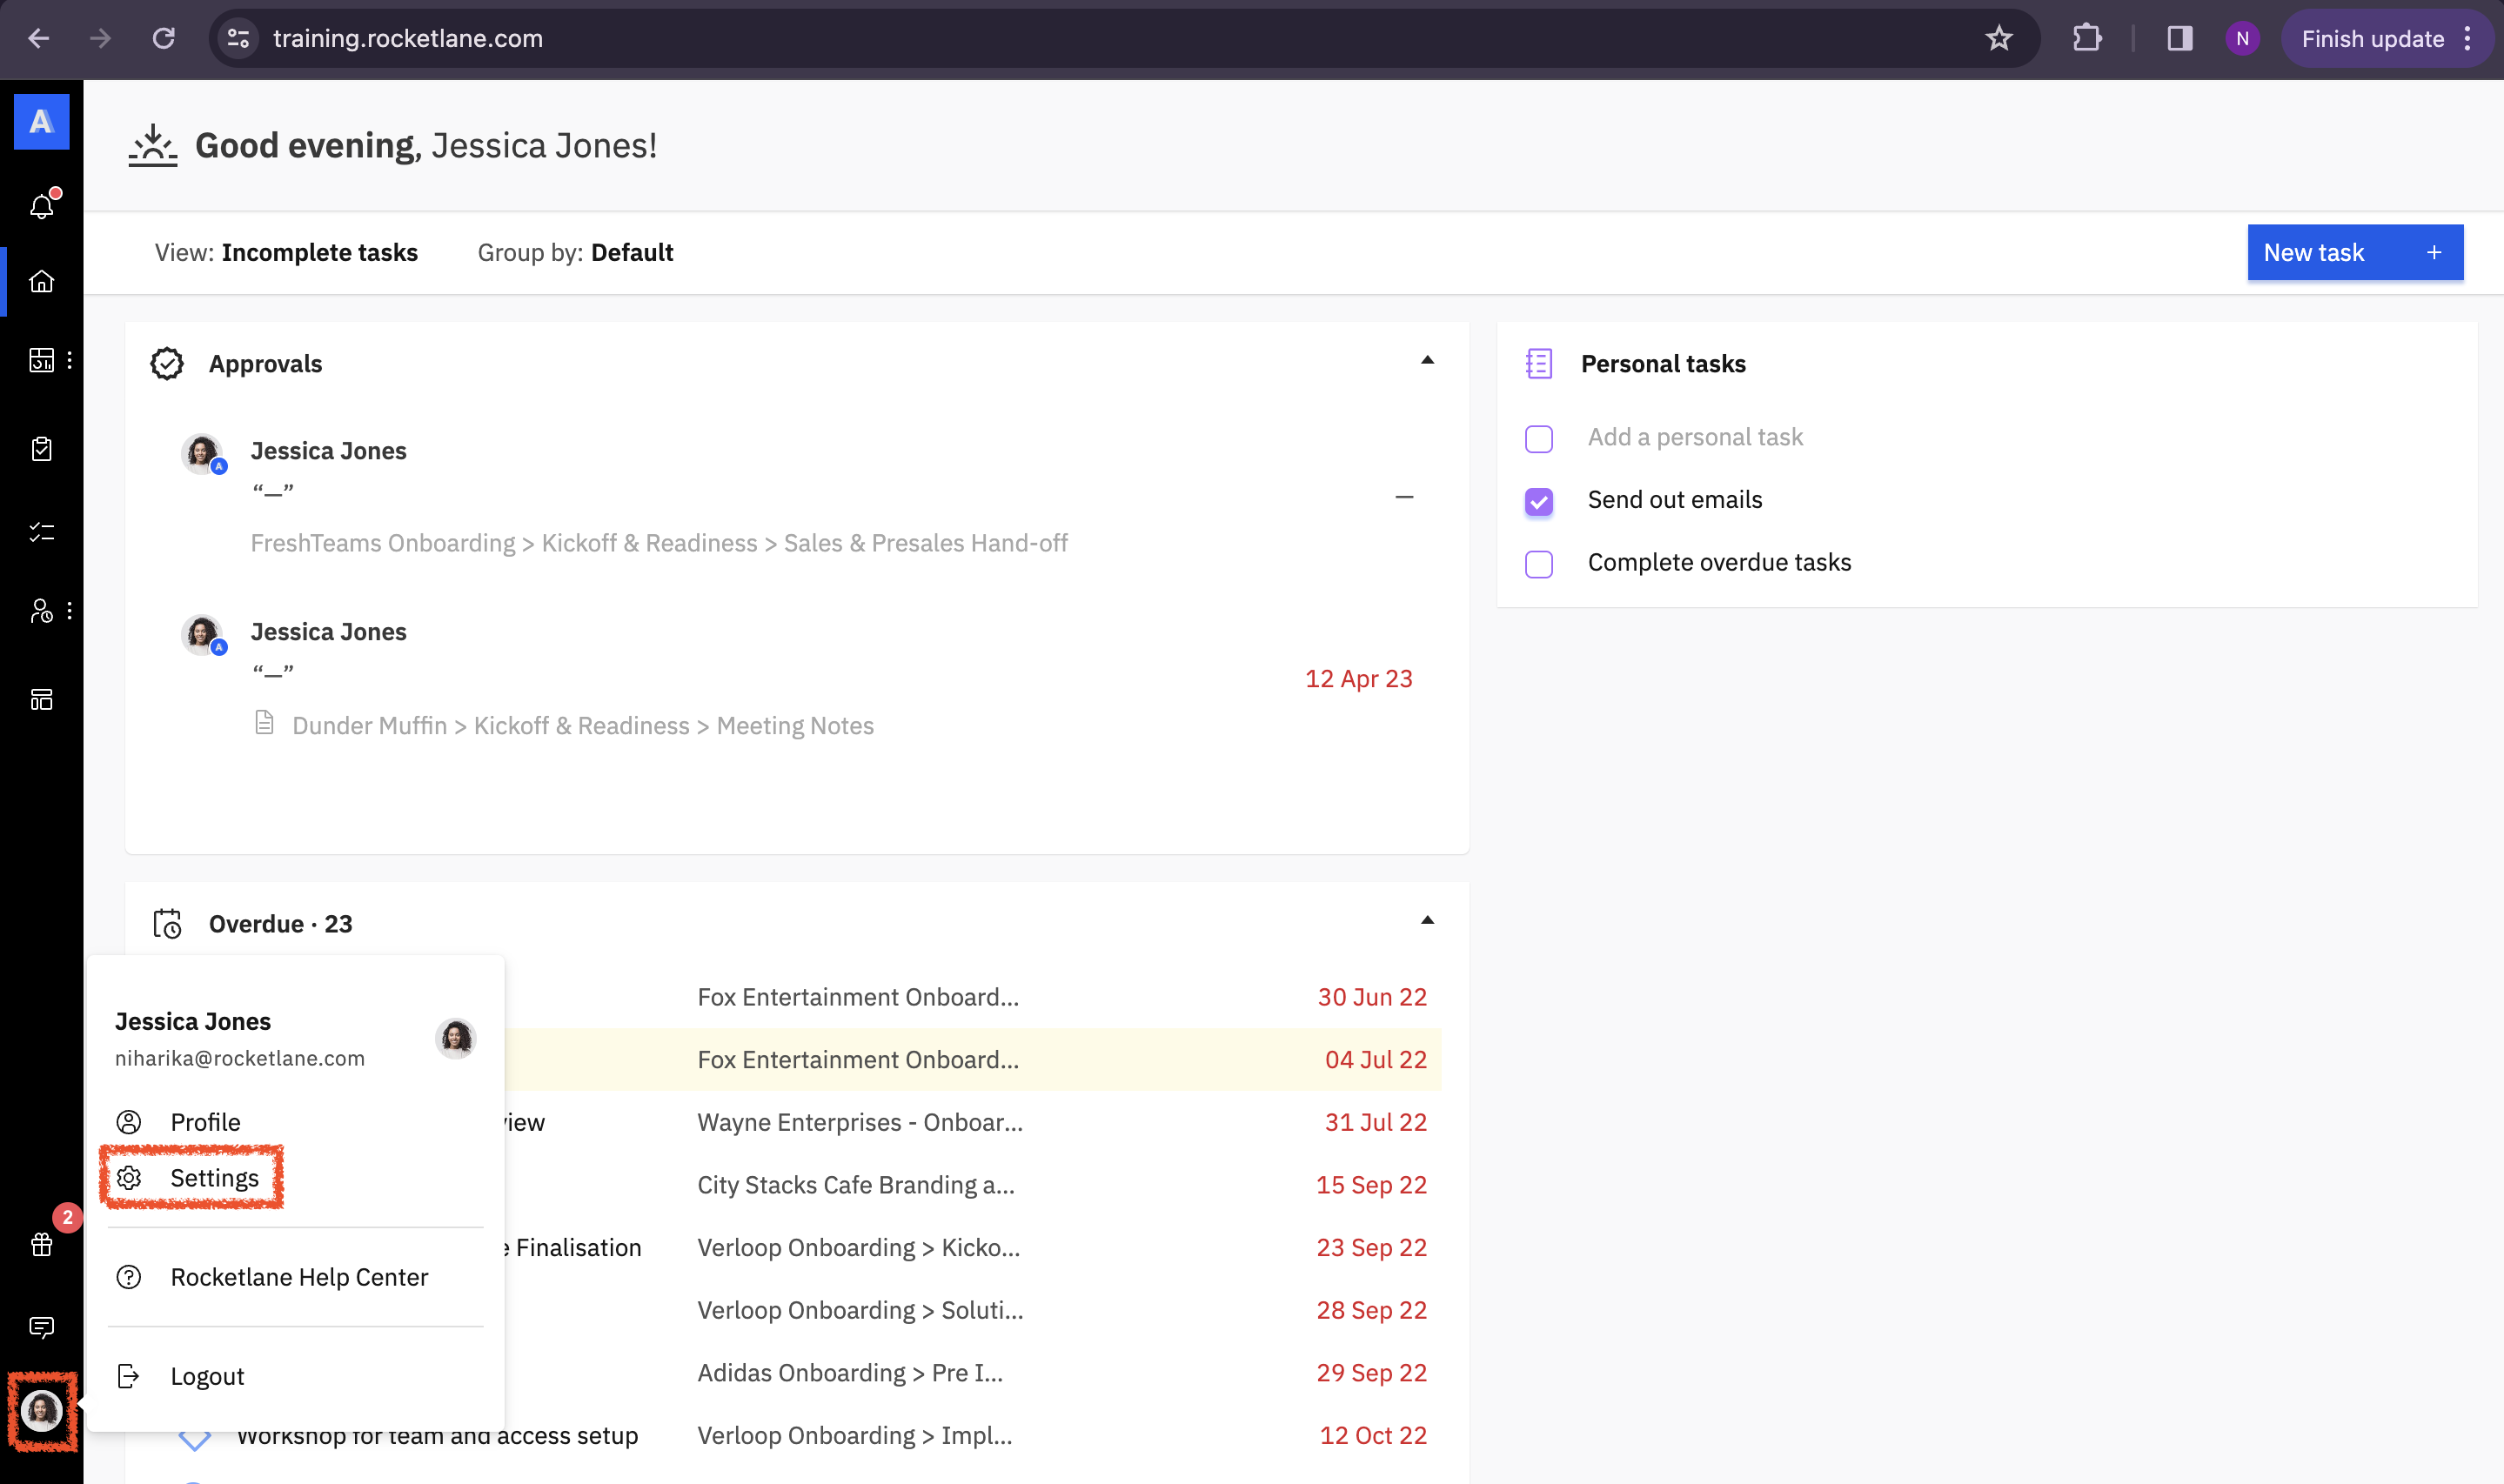
Log in to your Rocketlane account. From the left Nav bar, click on your Profile Icon > Settings.
Create a New Webhook
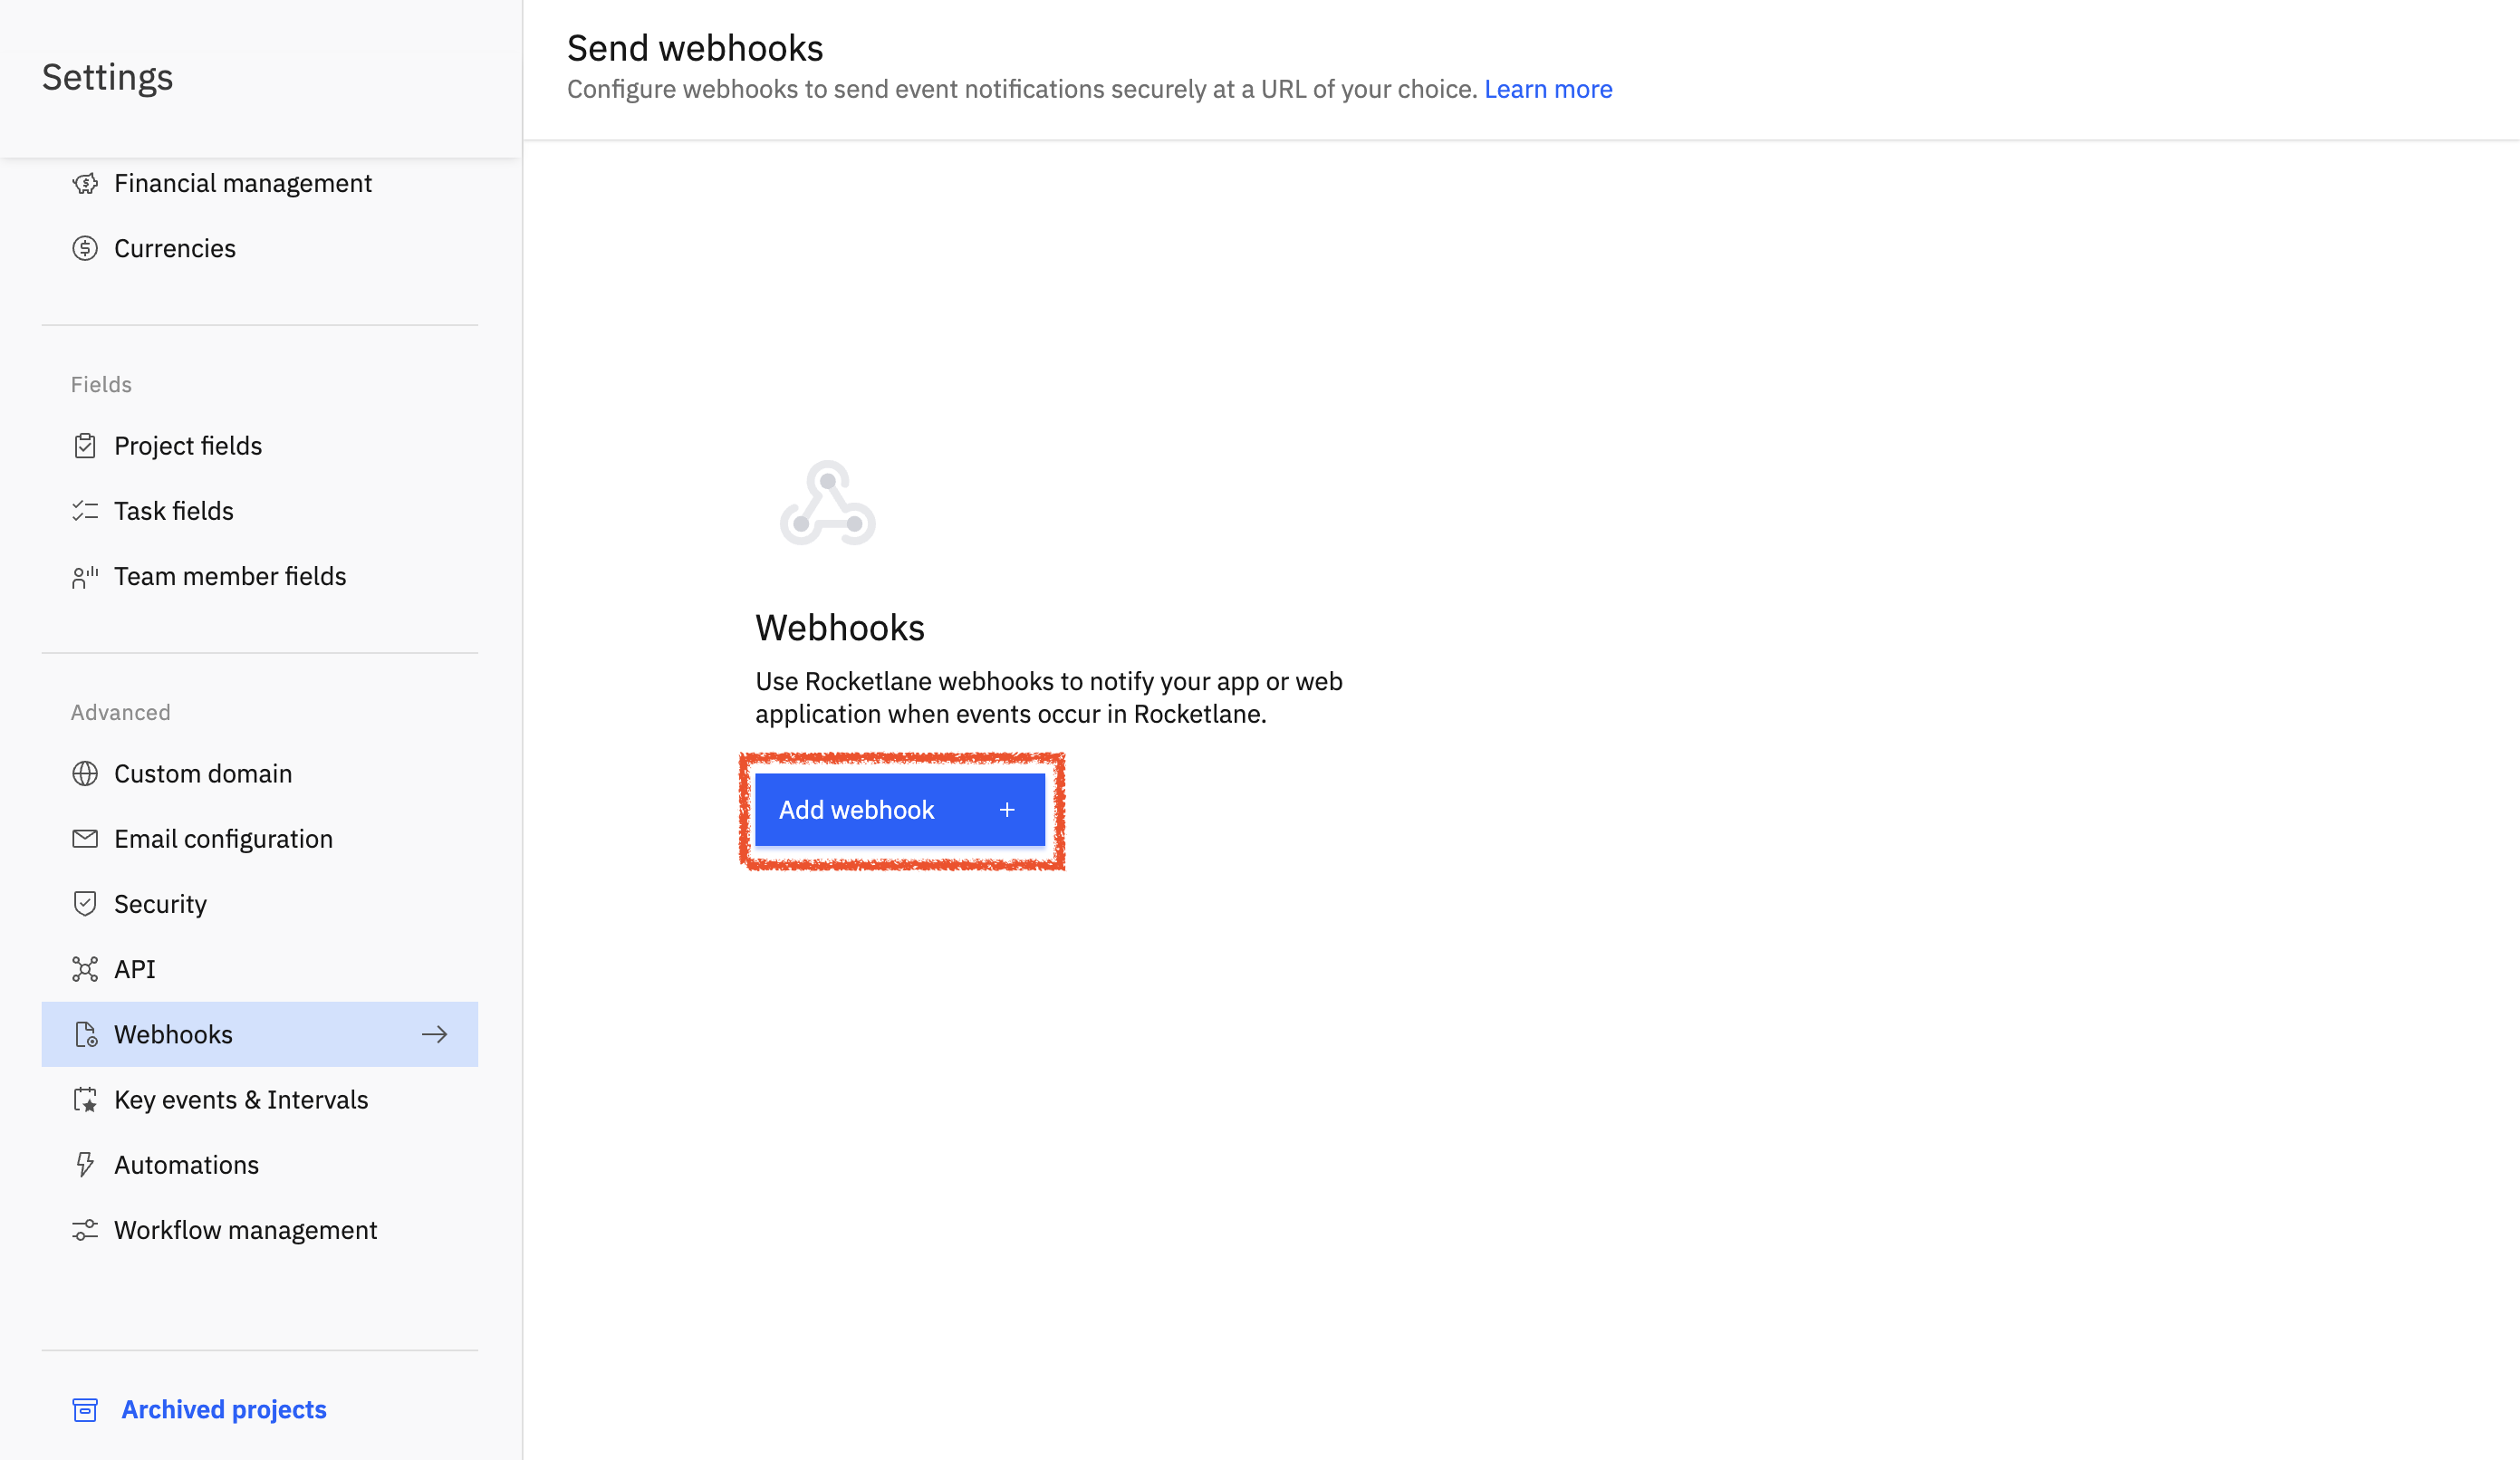
Click on Webhooks from the Settings menu. Click on "Add Webhook" button.
Configure Webhook Details
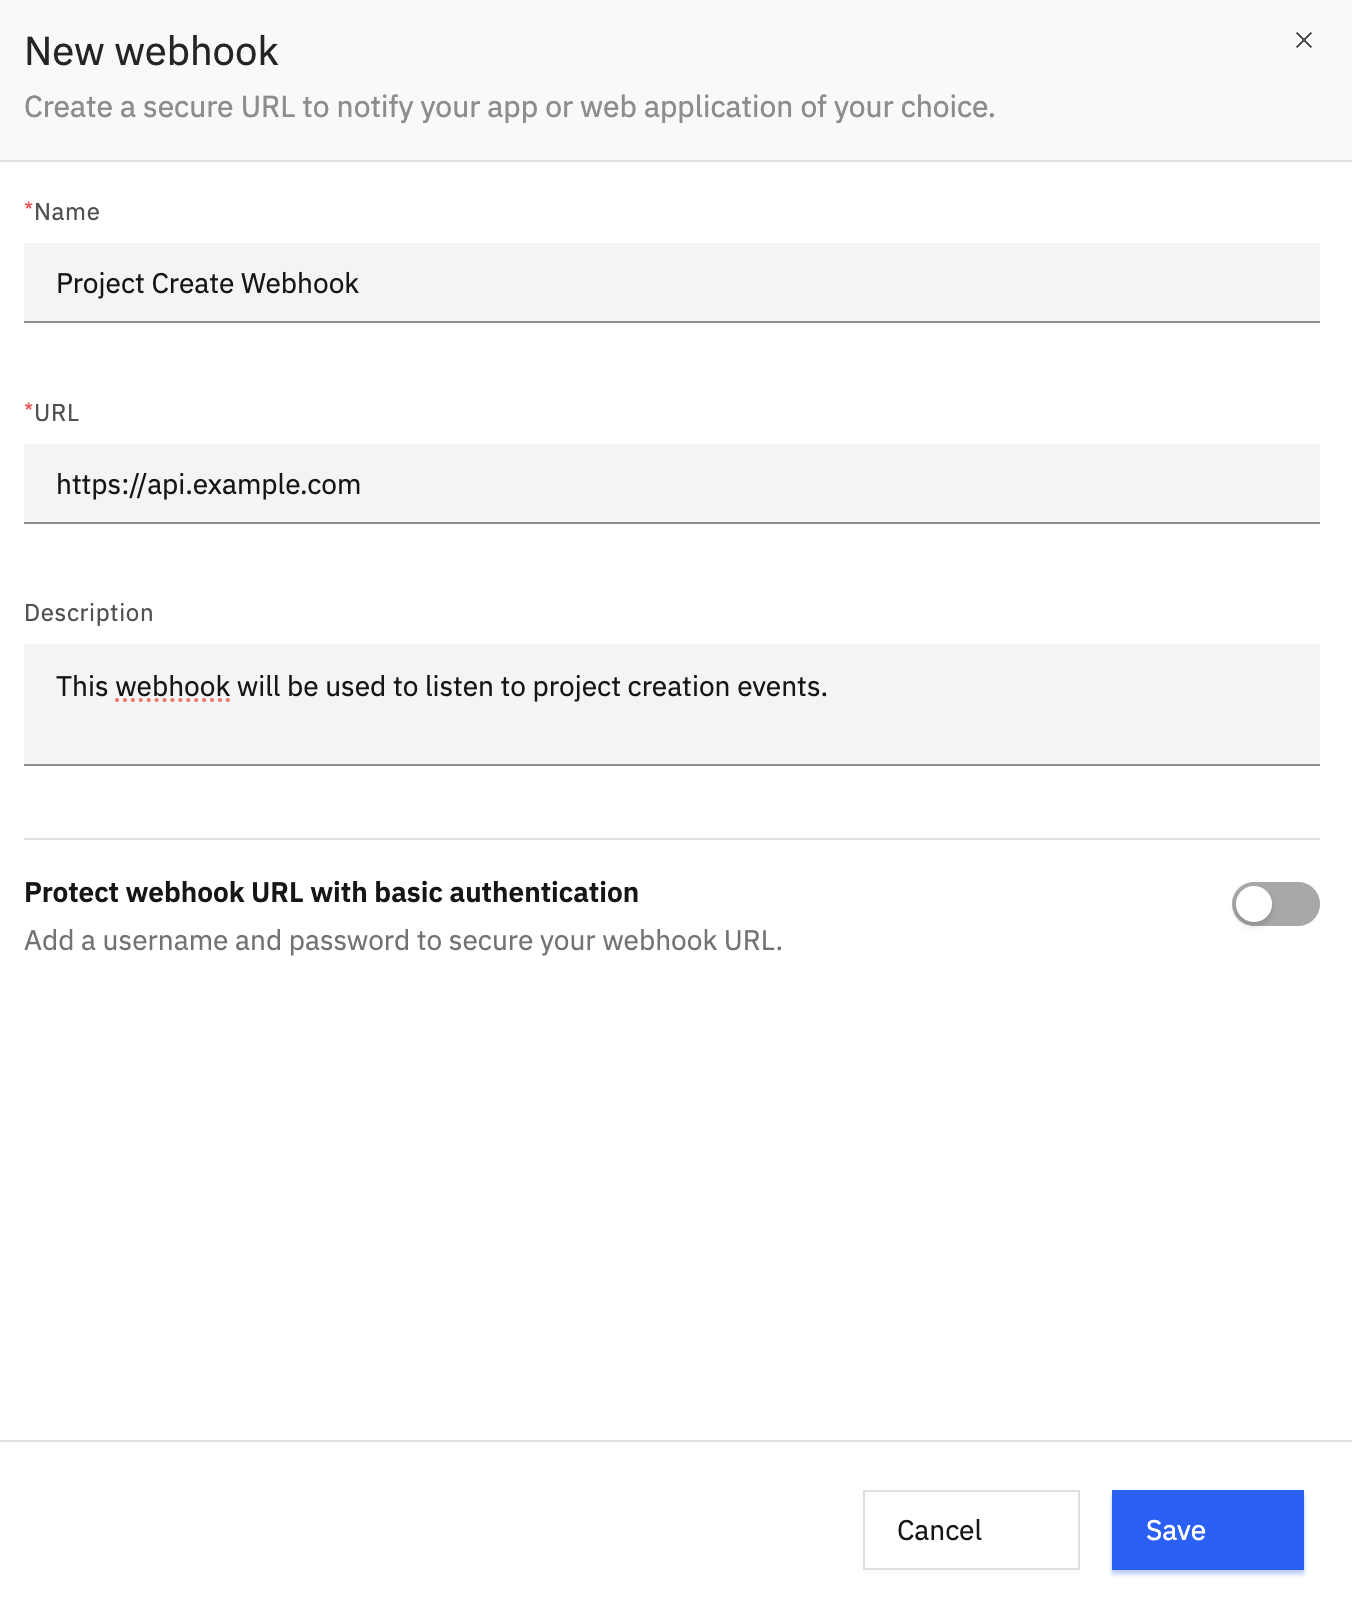
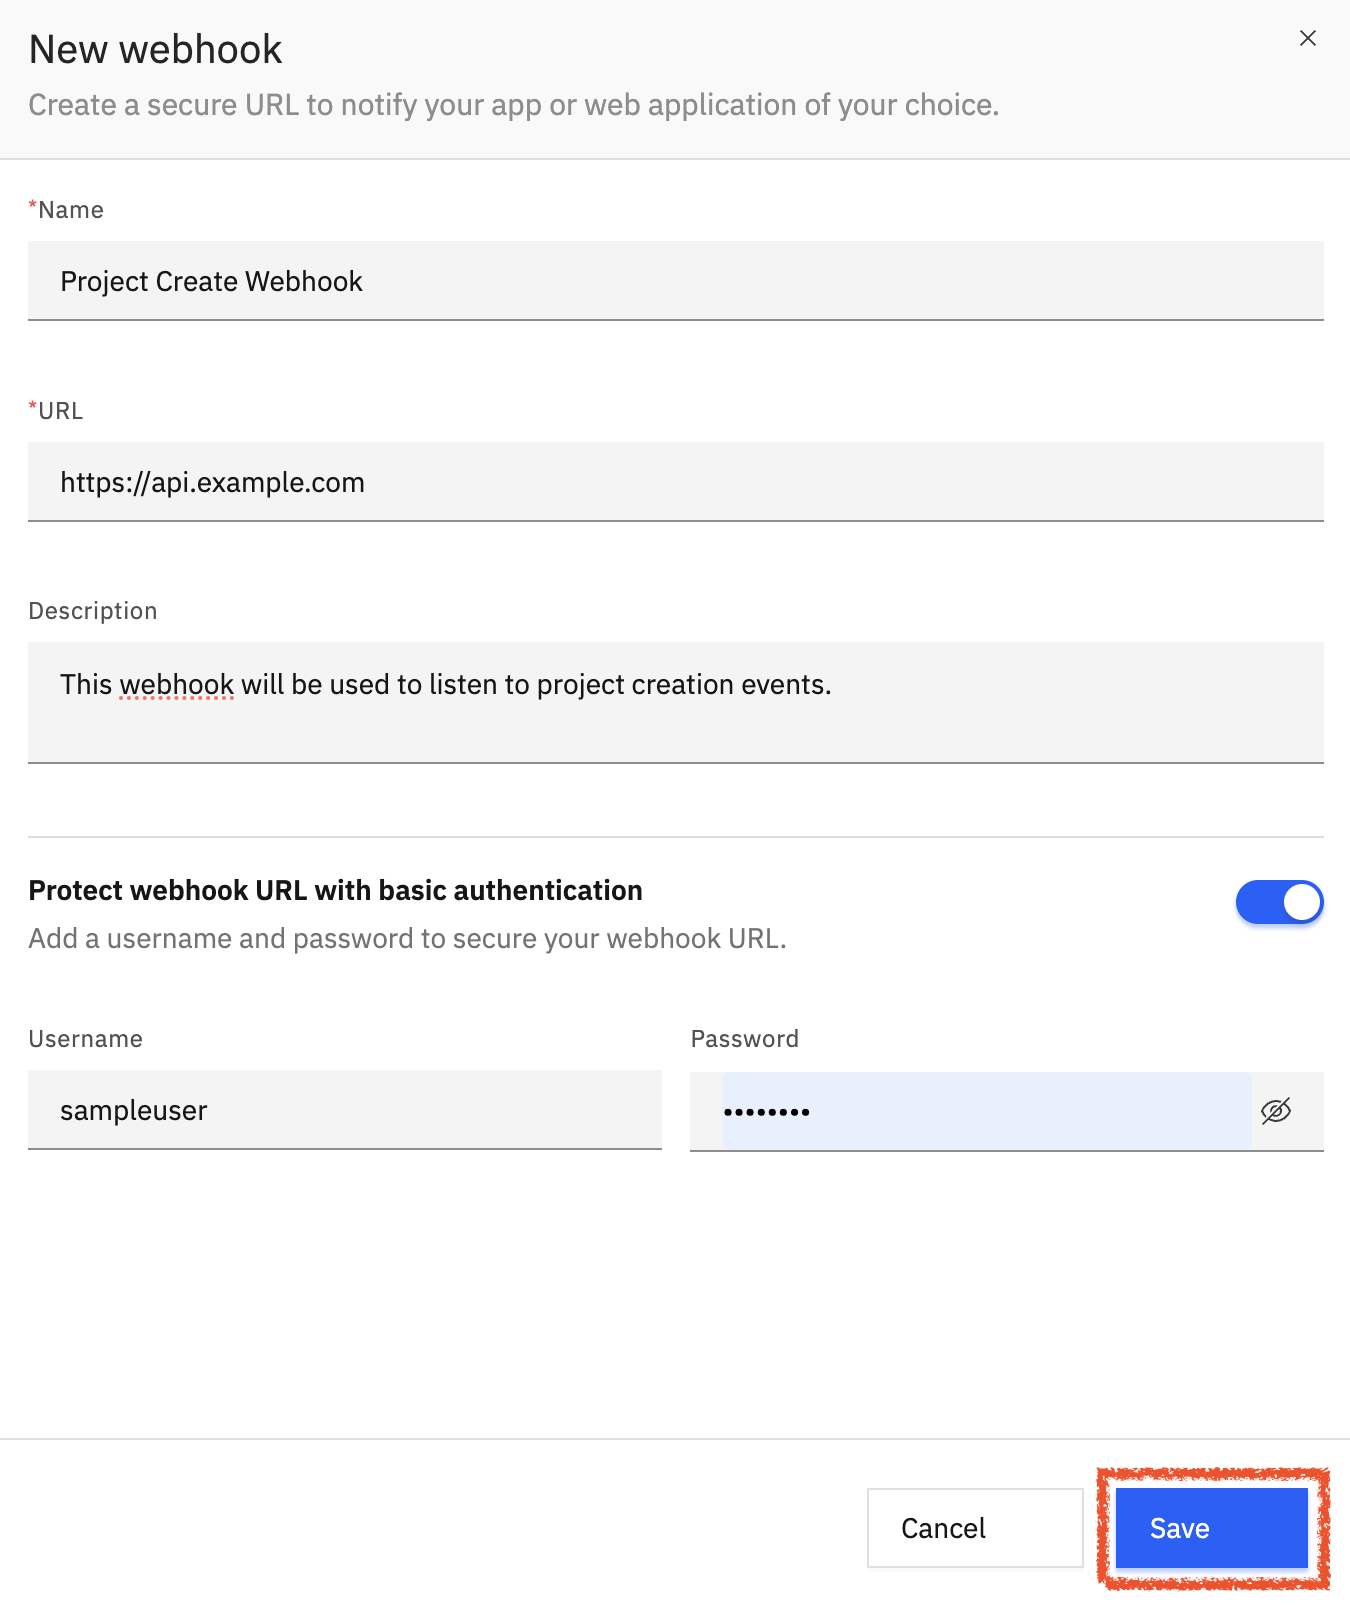
Fill in details for the webhook, including the Webhook Name and Webhook URL where Rocketlane should send the webhook request. Rocketlane only supports https in webhook URLs for security.
Set Up Authentication (Optional)
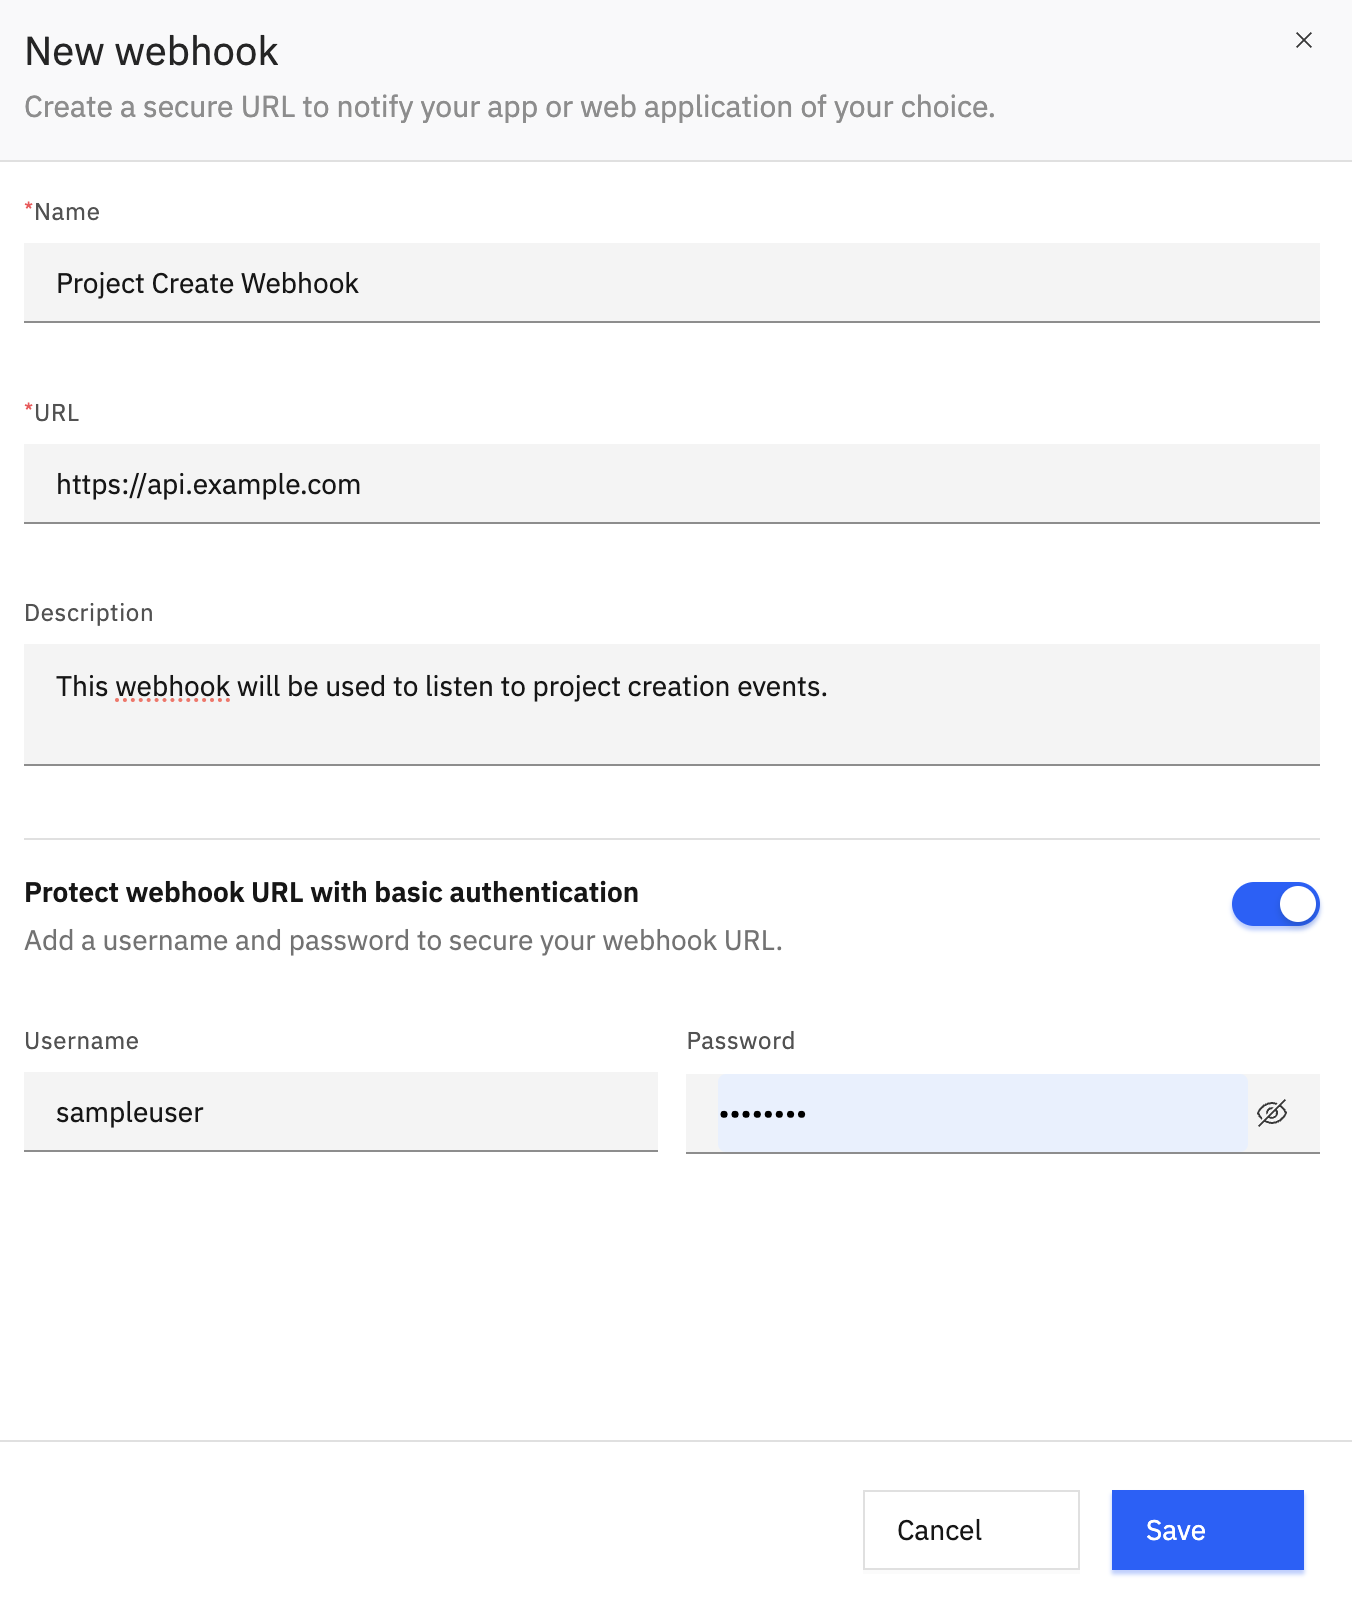
Rocketlane supports authentication for webhooks to secure the communication between Rocketlane and the external
system.
Only Basic Authentication is supported currently.
Please configure the necessary authentication parameters - username and password.
Even though this step is optional, it is recommended that your webhook URLs be protected using basic authentication.
Save your Webhook
Click save to create the new Webhook and now it is ready to be used in automations.
Setting up Webhook triggers
-
Create an automation
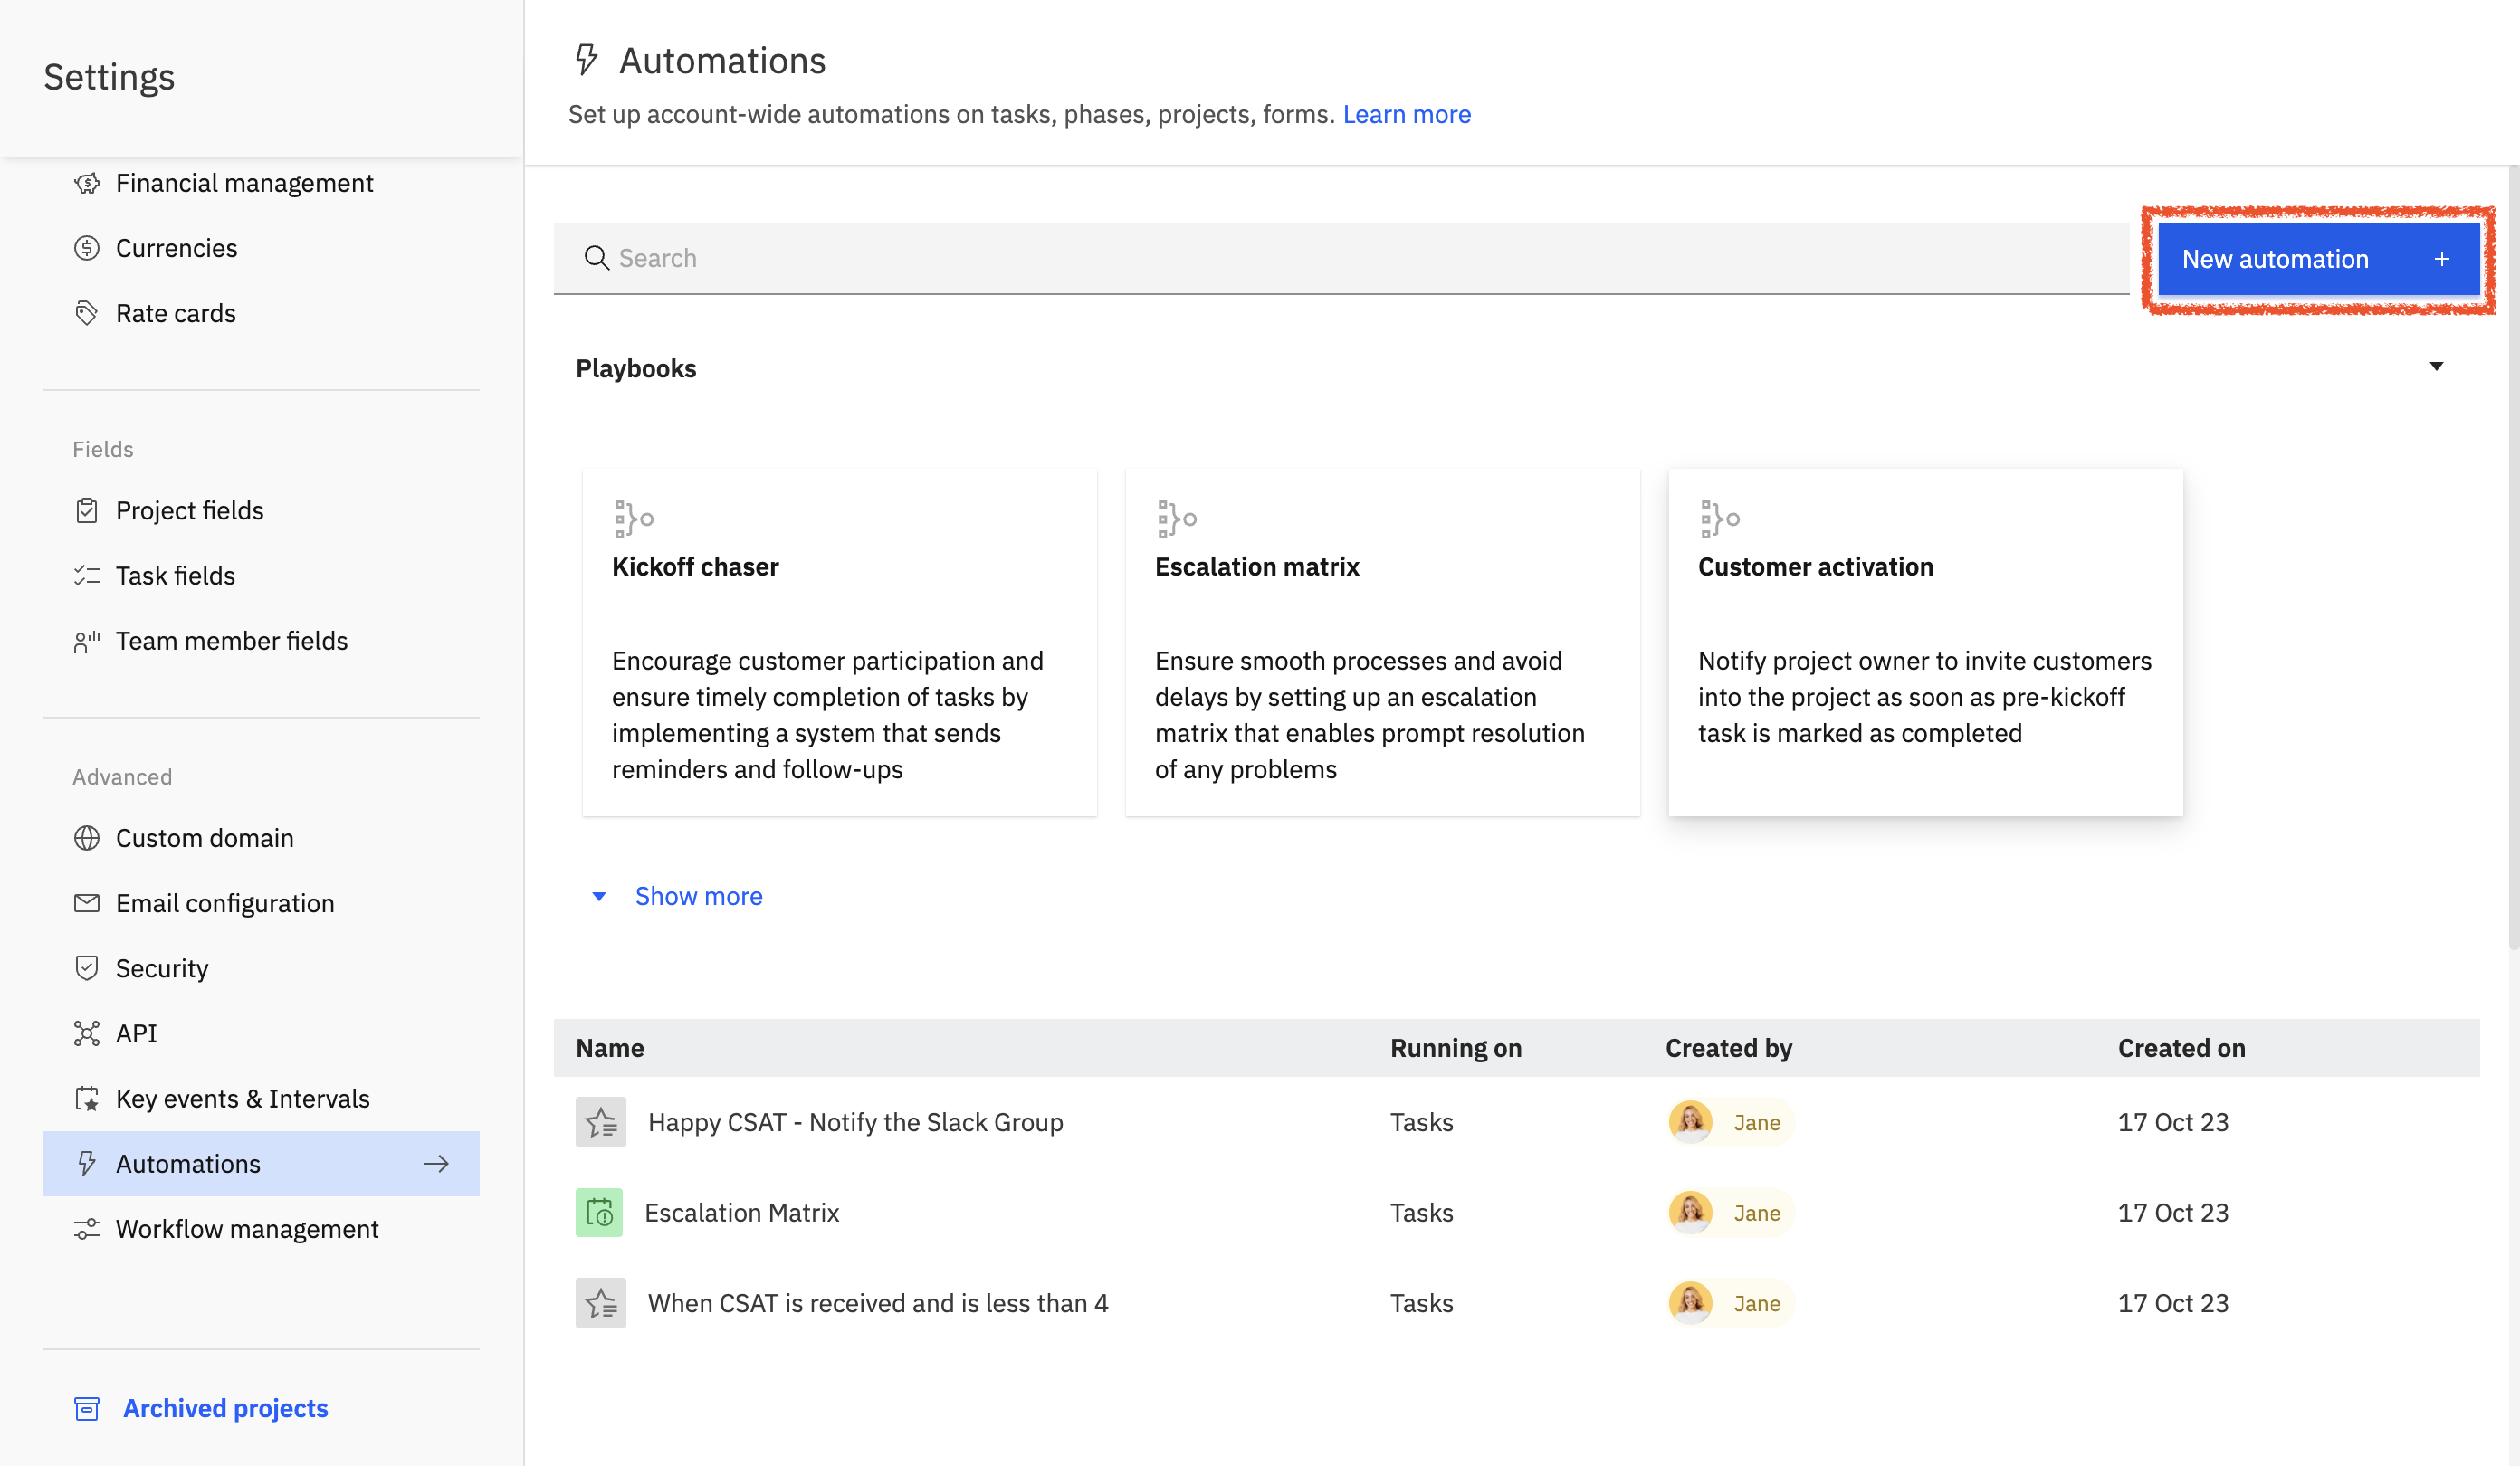
Go to automations. Create a new automation
-
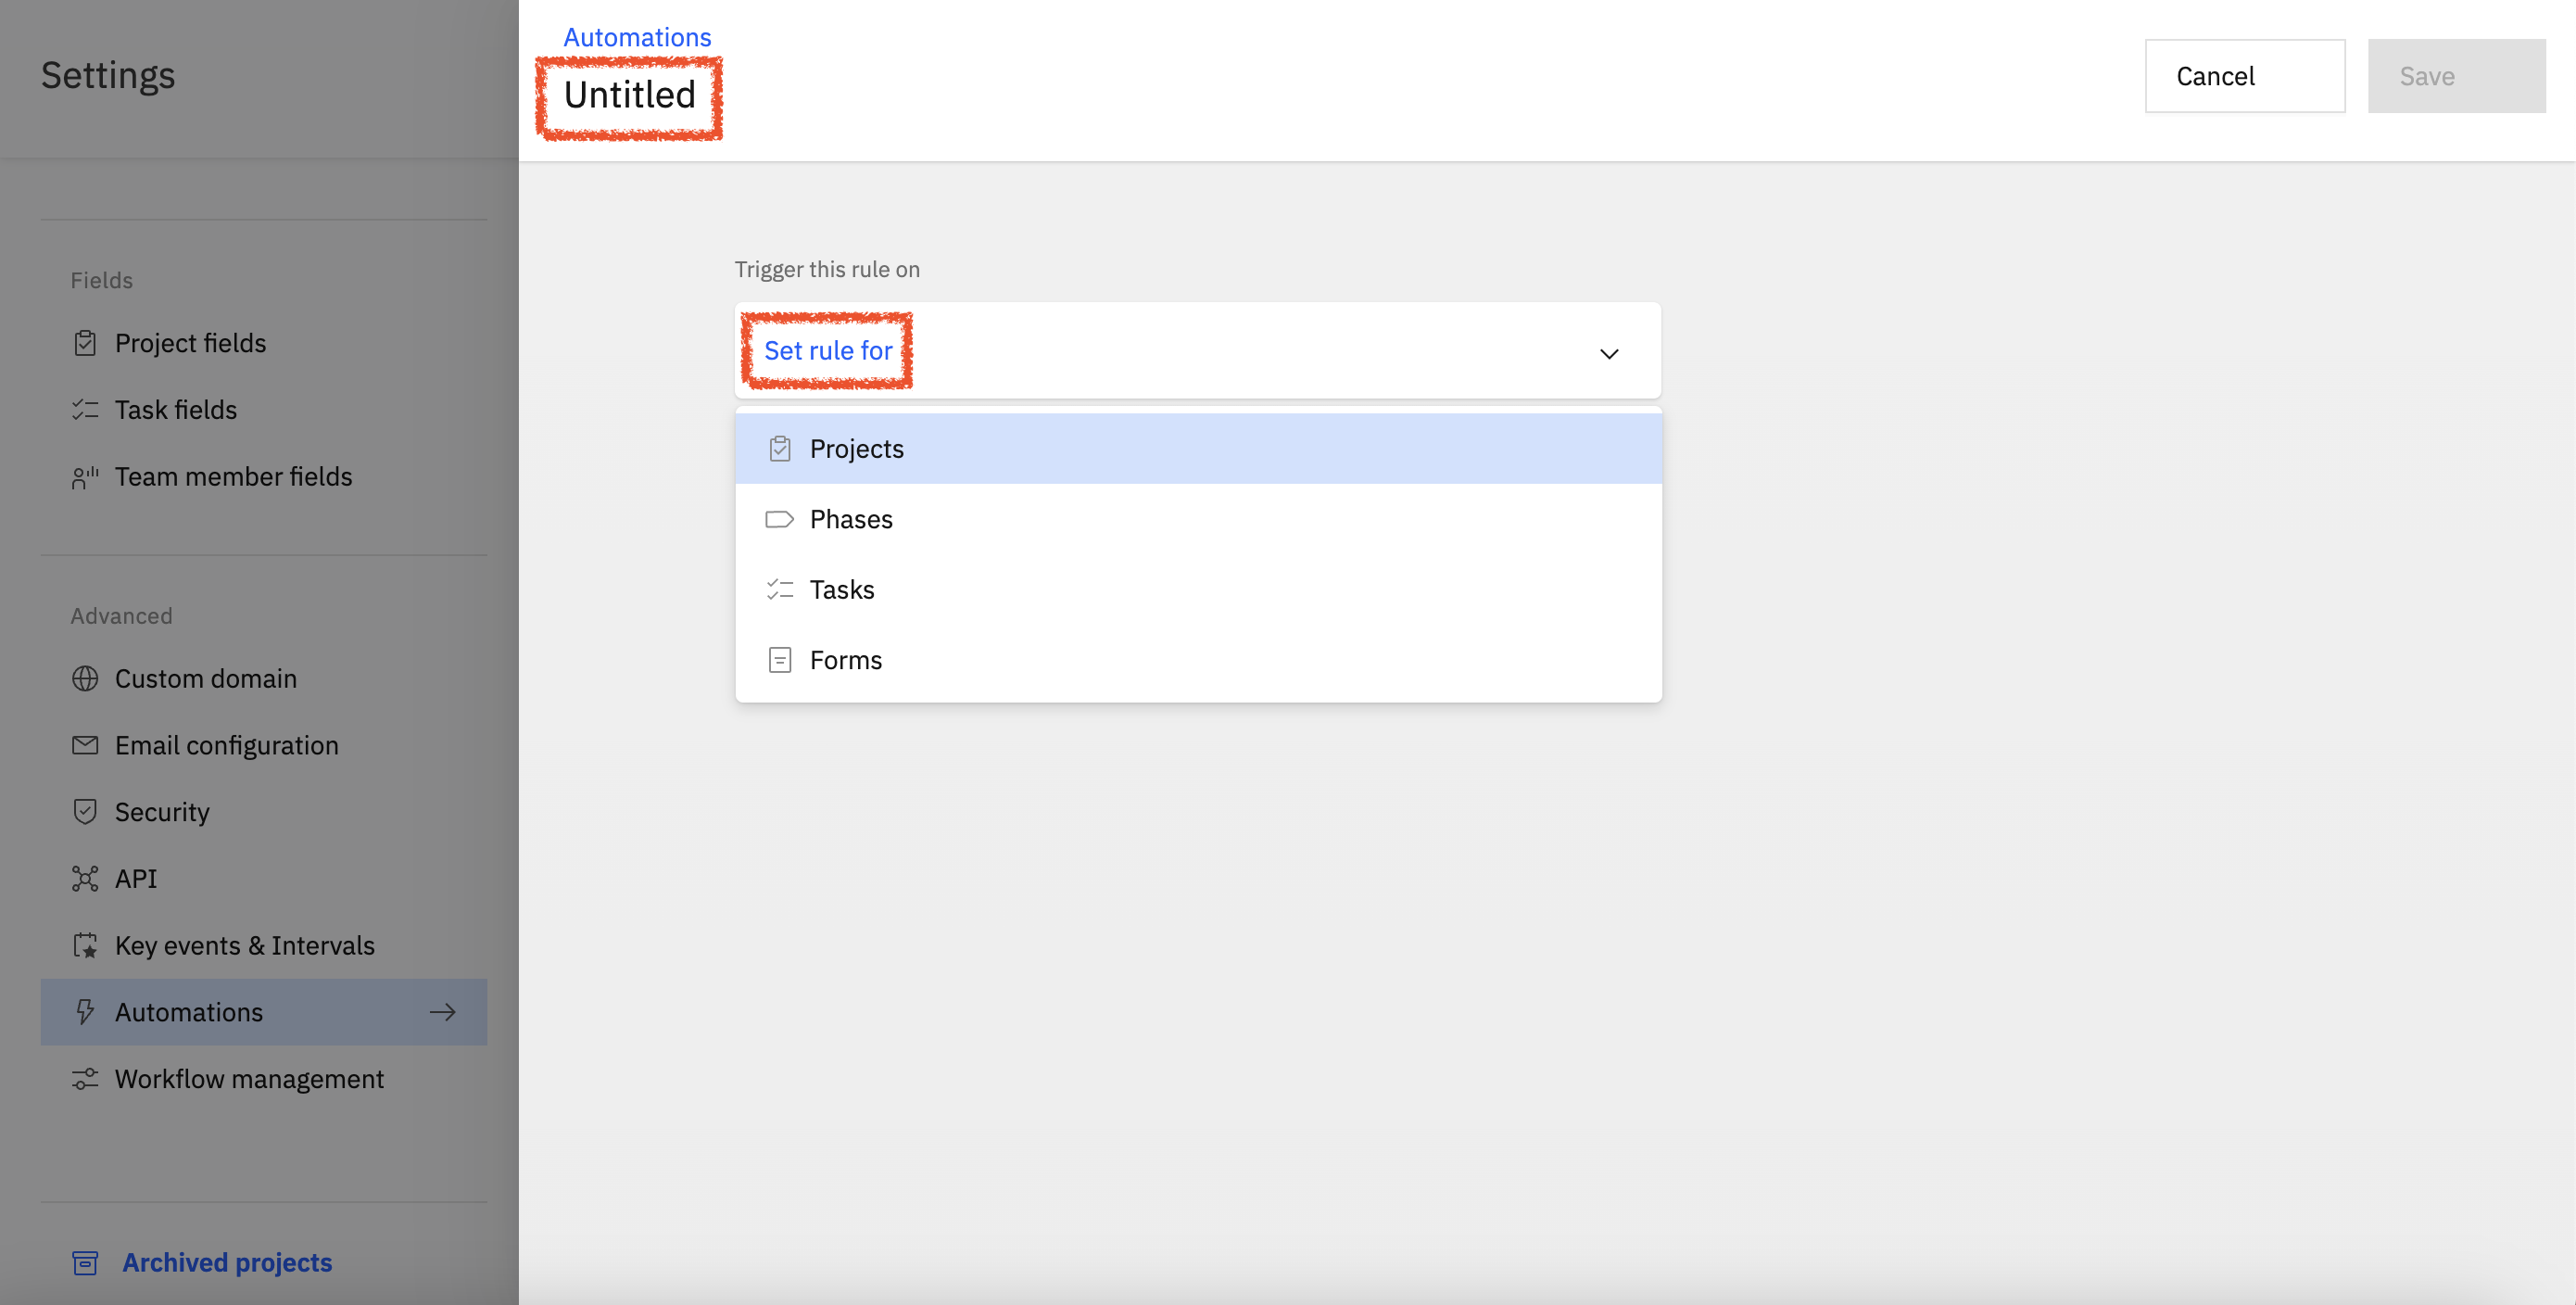
Add the name of the automation and select the trigger rule
Currently, we only support task triggers for webhooks.
-
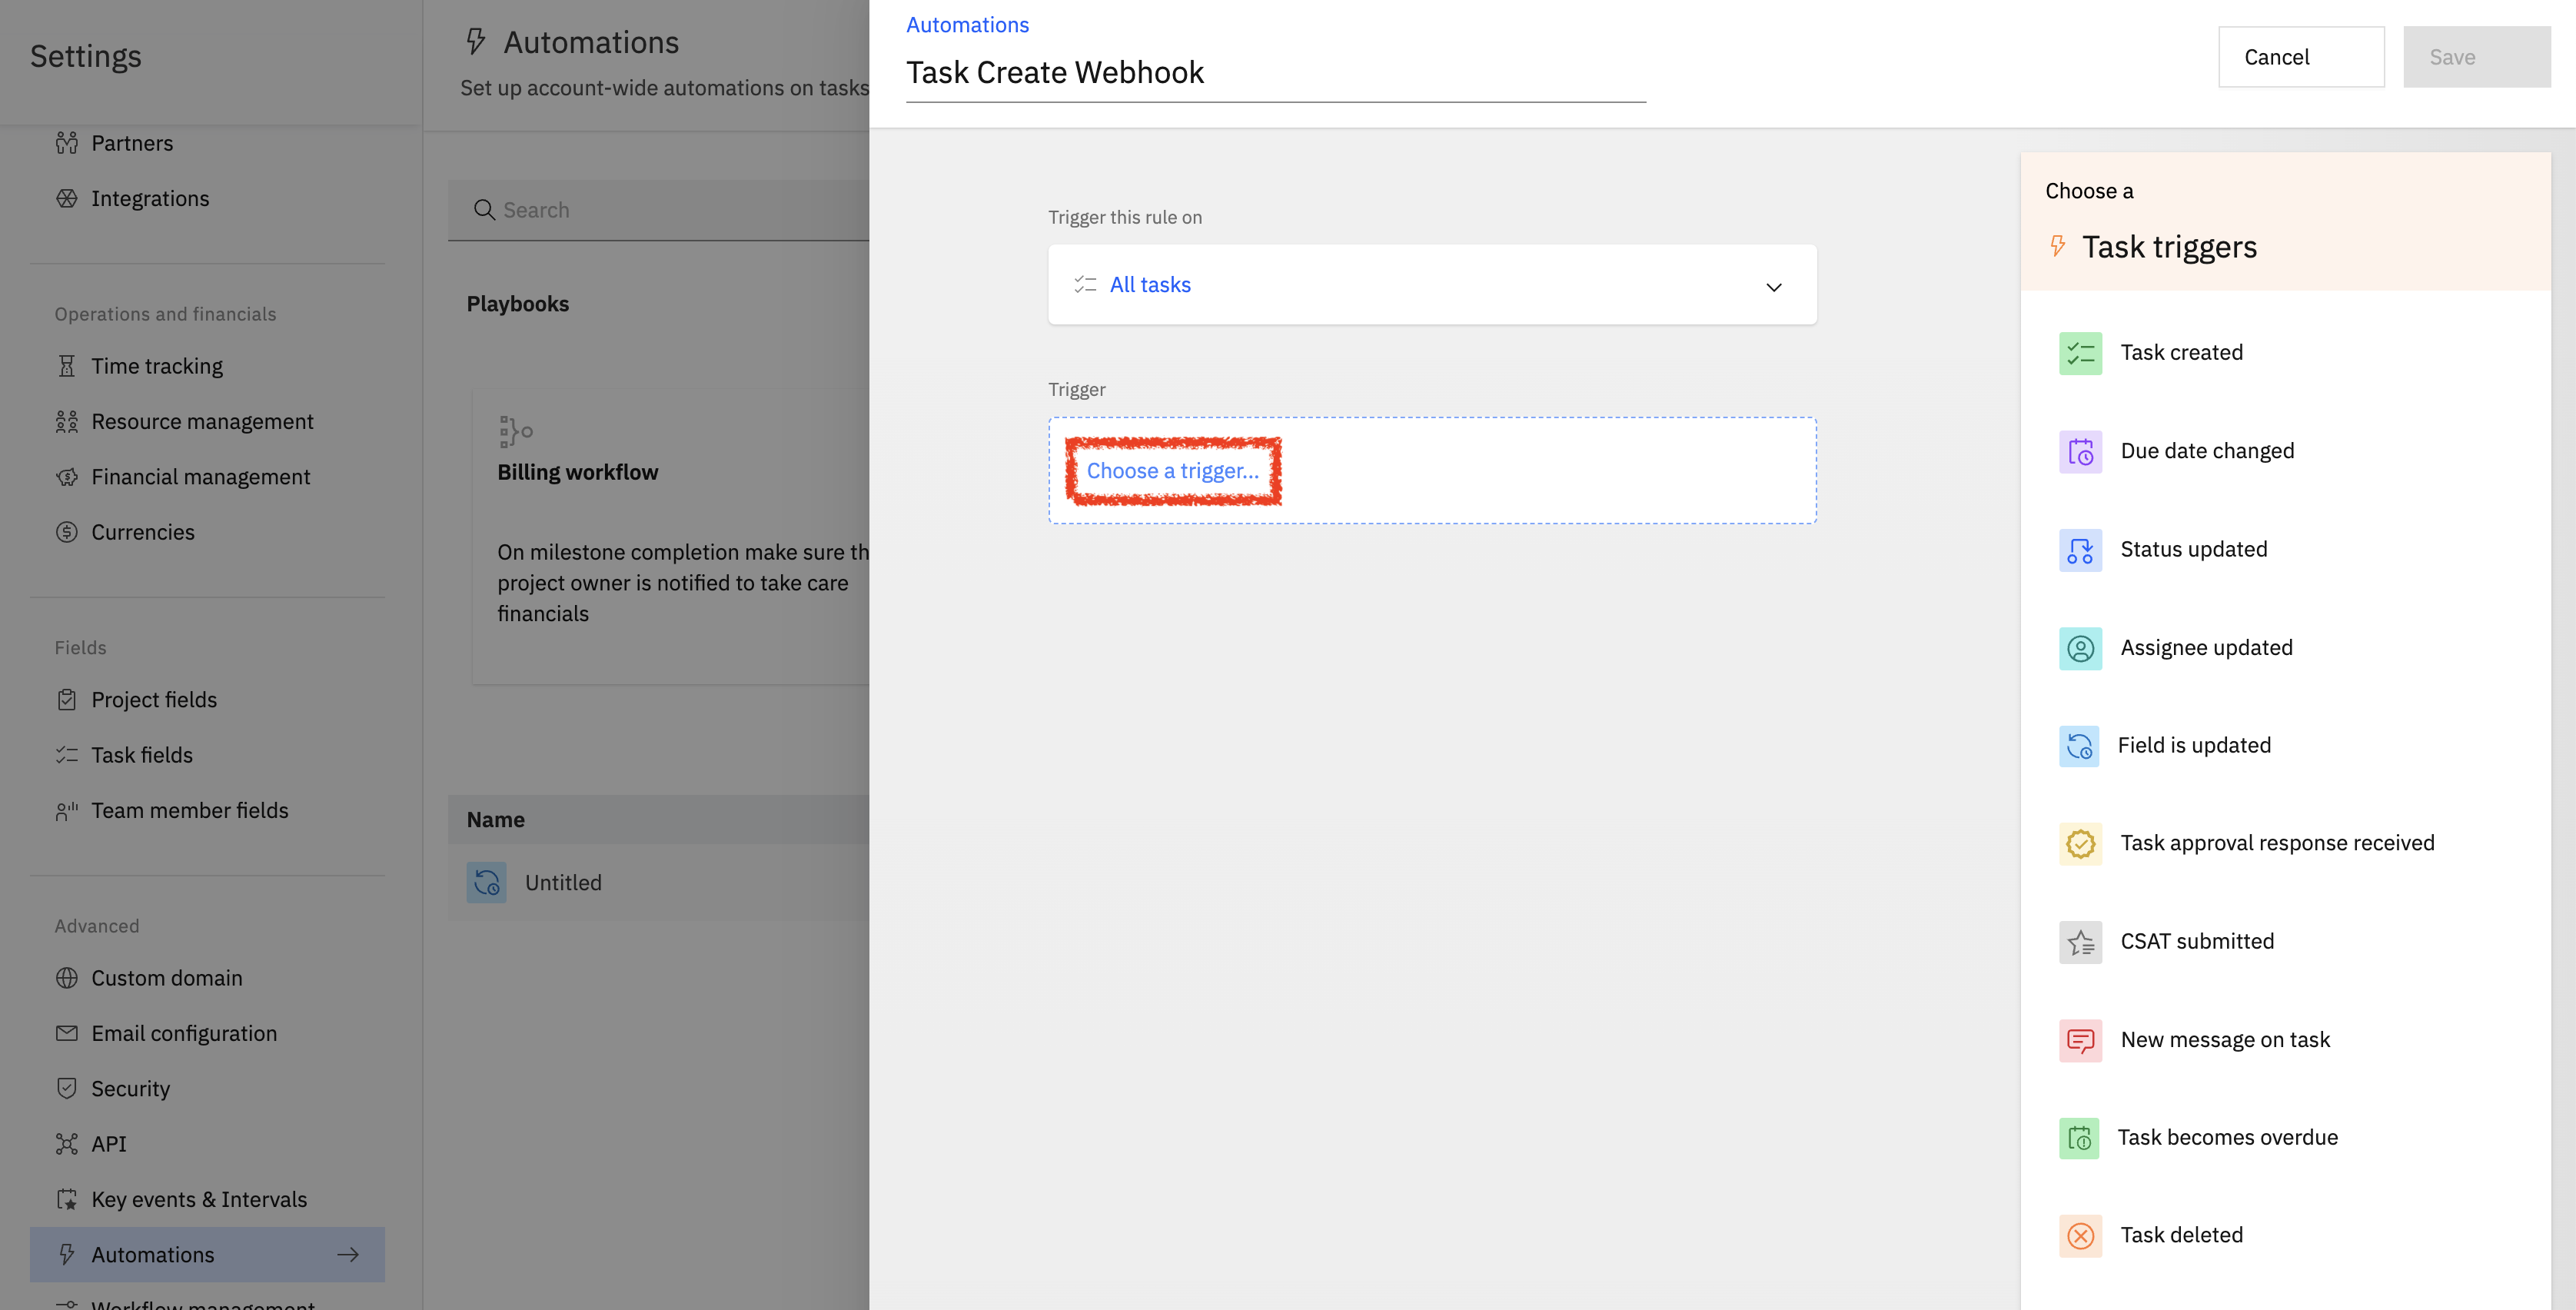
Set up trigger event
Choose the trigger event for which you want the webhook to send updates.
-
Set up conditions using filters (Optional)
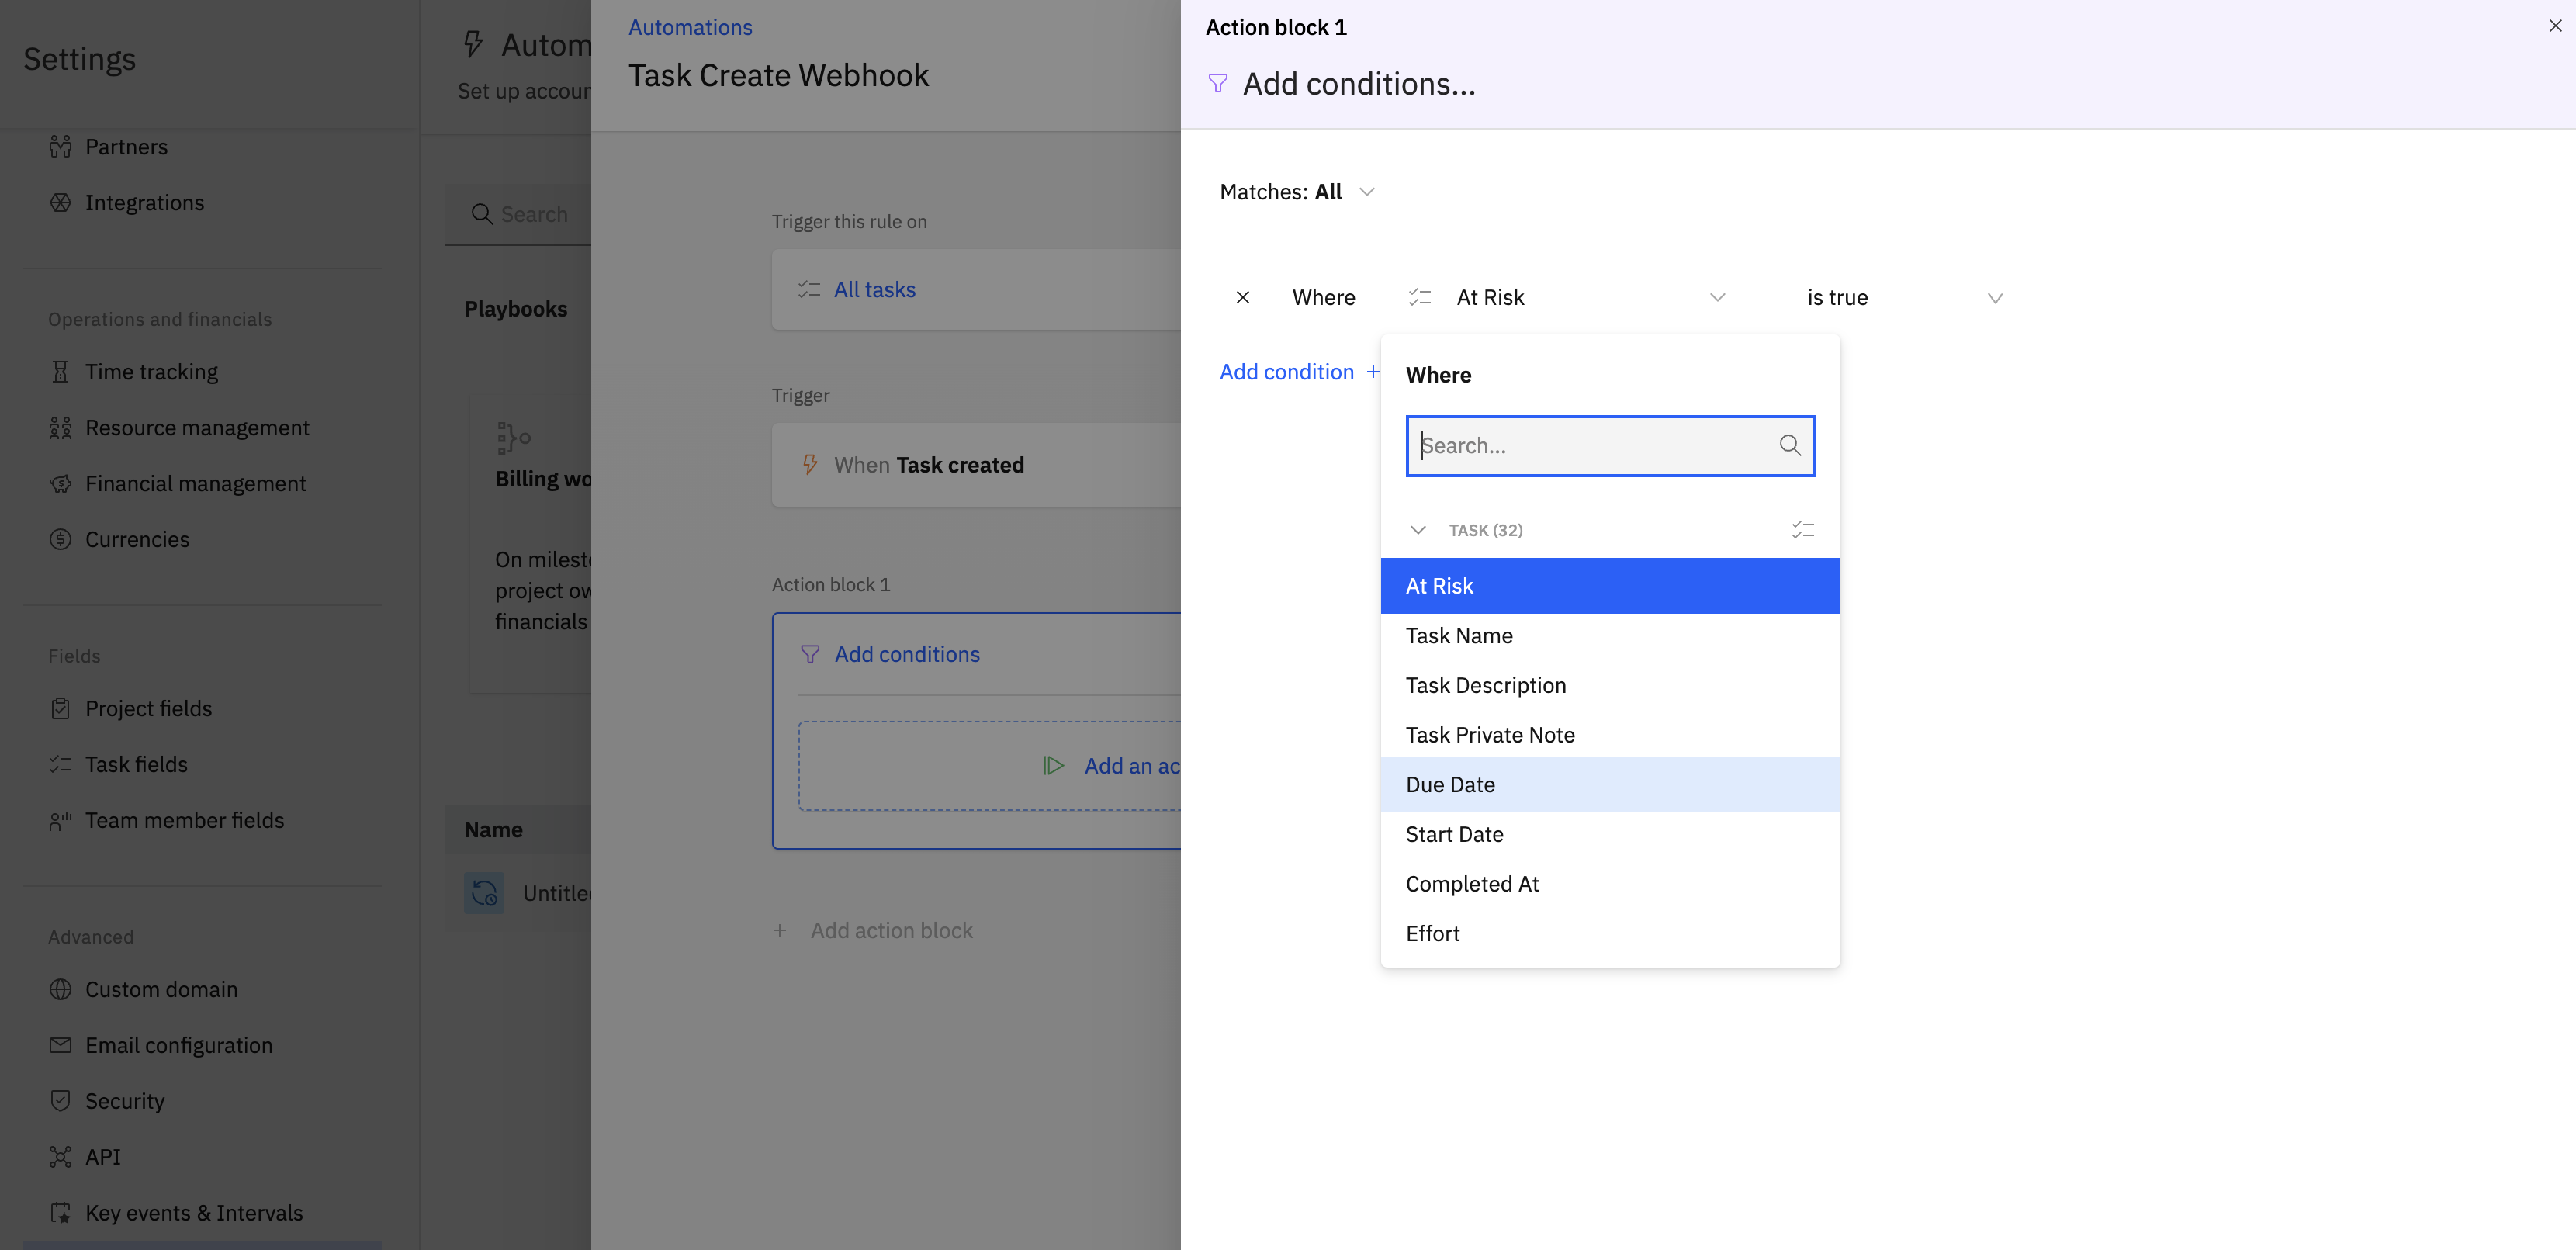
Click on 'Add condition' to set up conditions for the action to be performed.
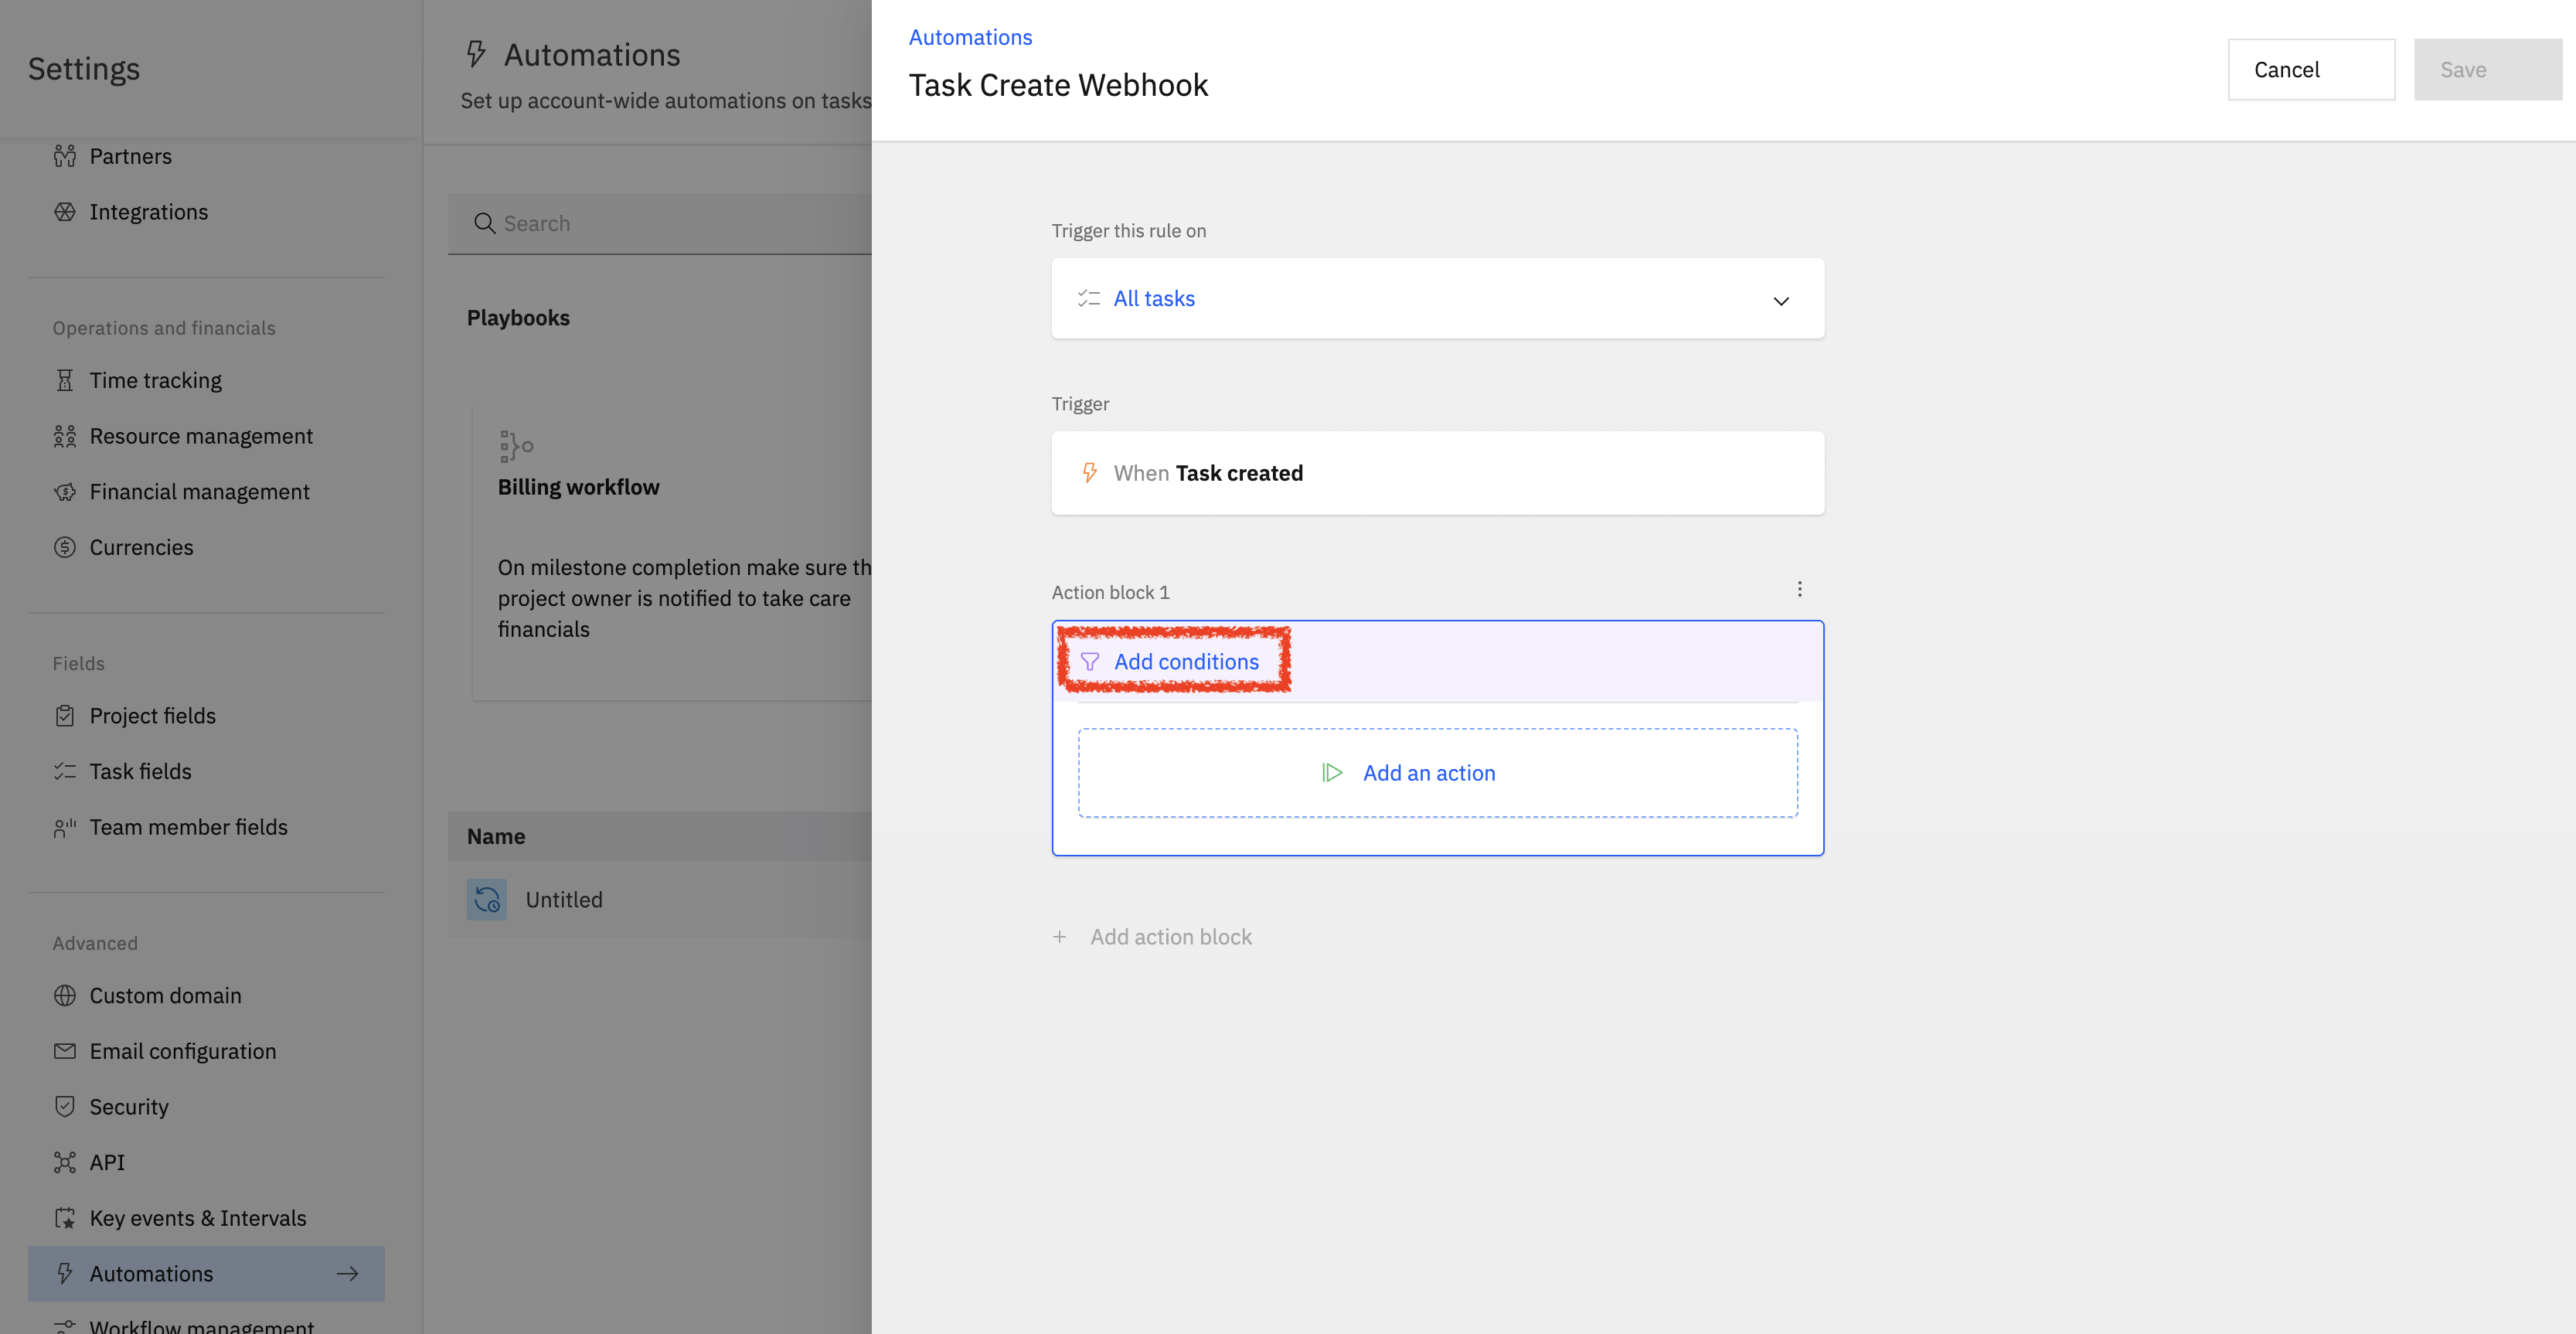
You can set up the filter conditions based on the trigger that you have chosen.
-
Add "Send Webhook" action
Please click on 'Add an action' and then select 'Send webhook'.
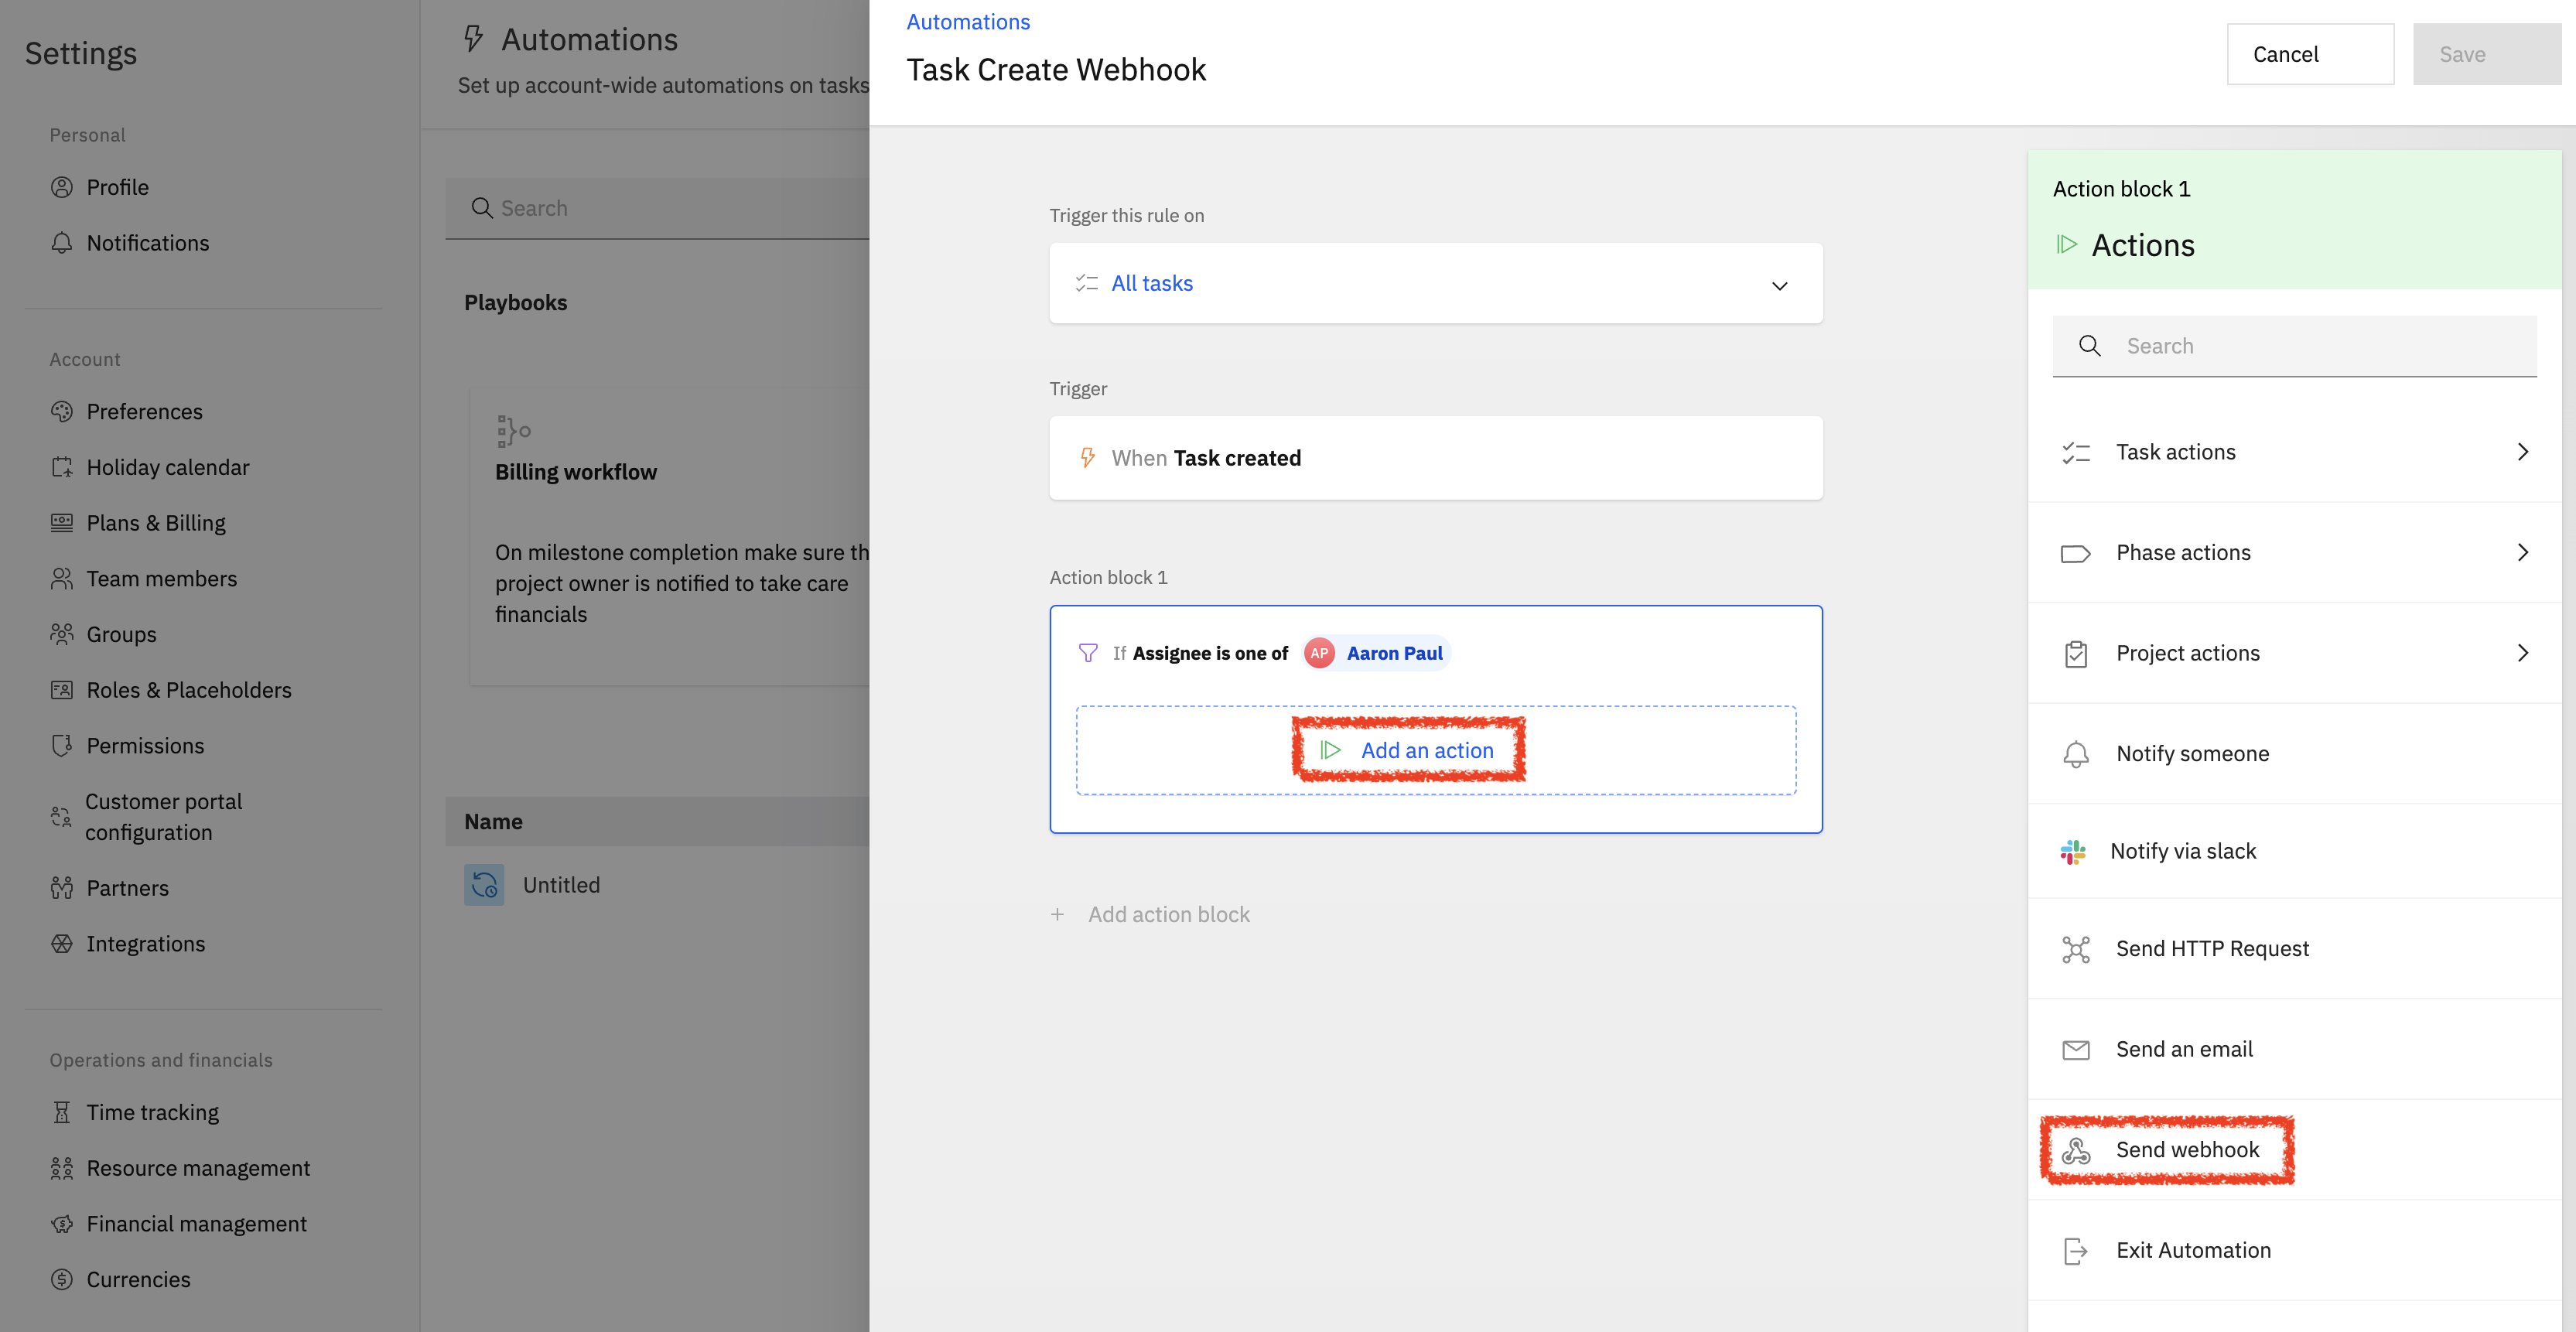
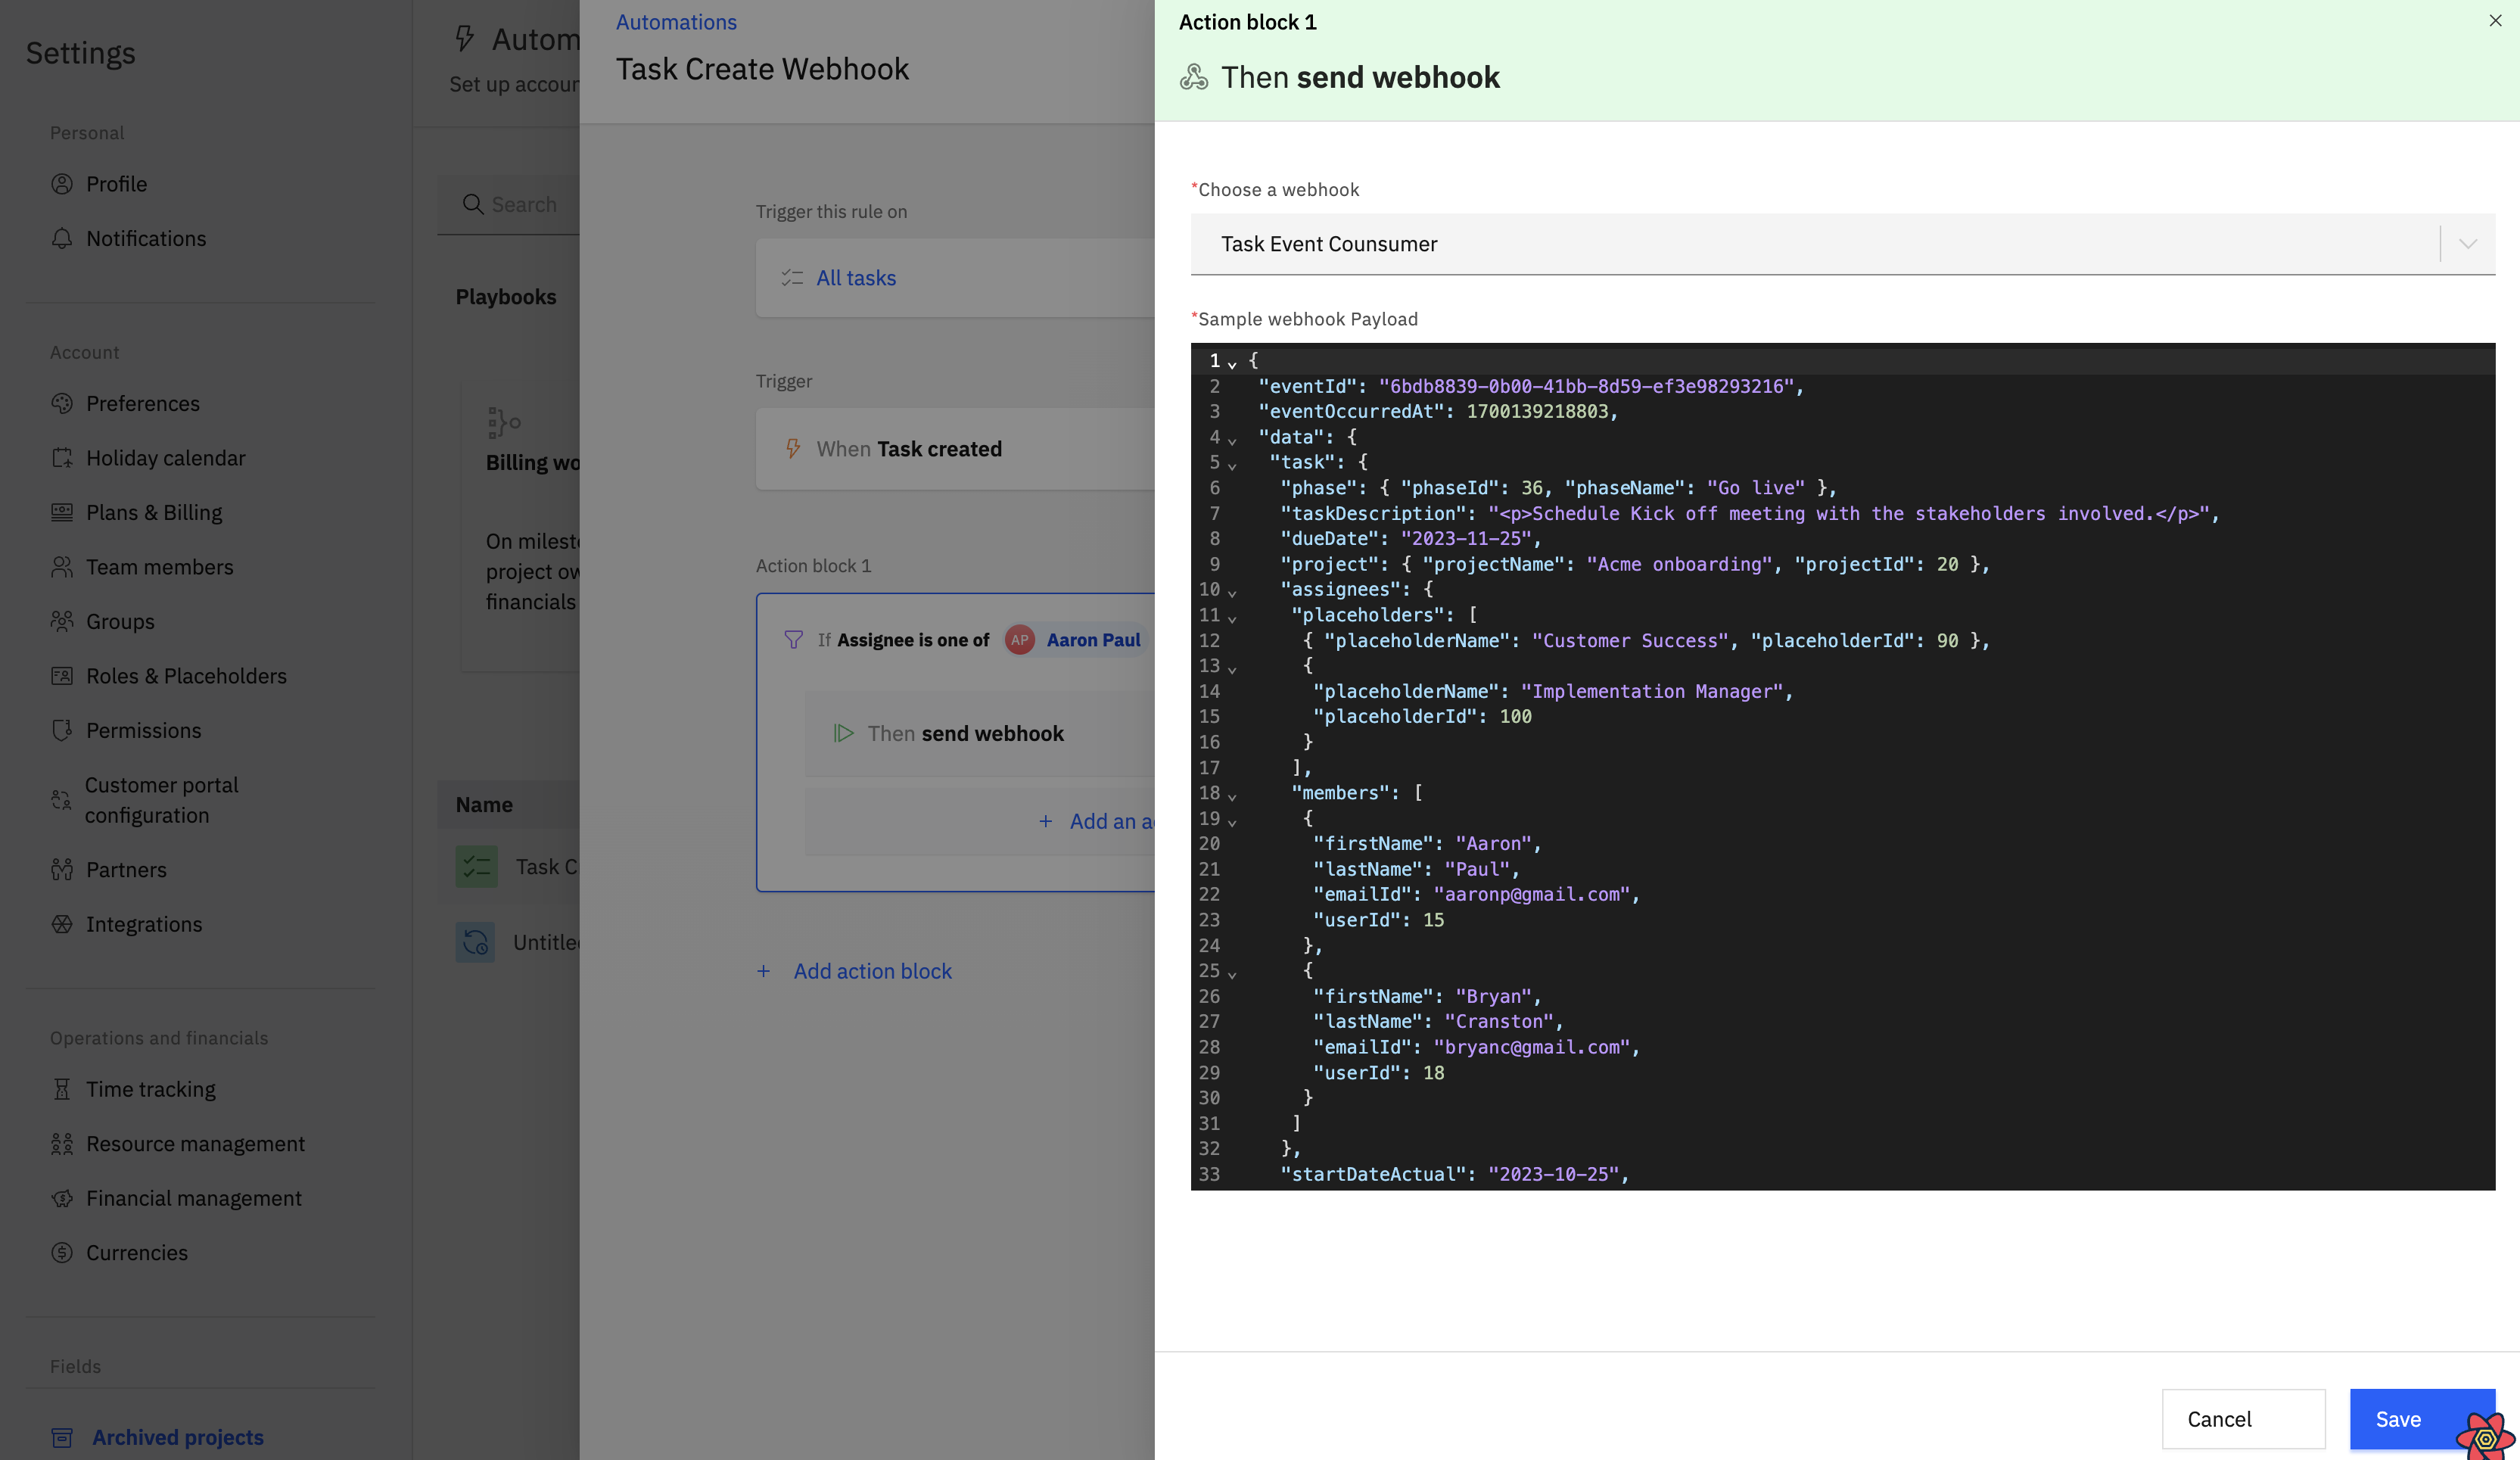
You can select the webhook from the drop down list in the action block.
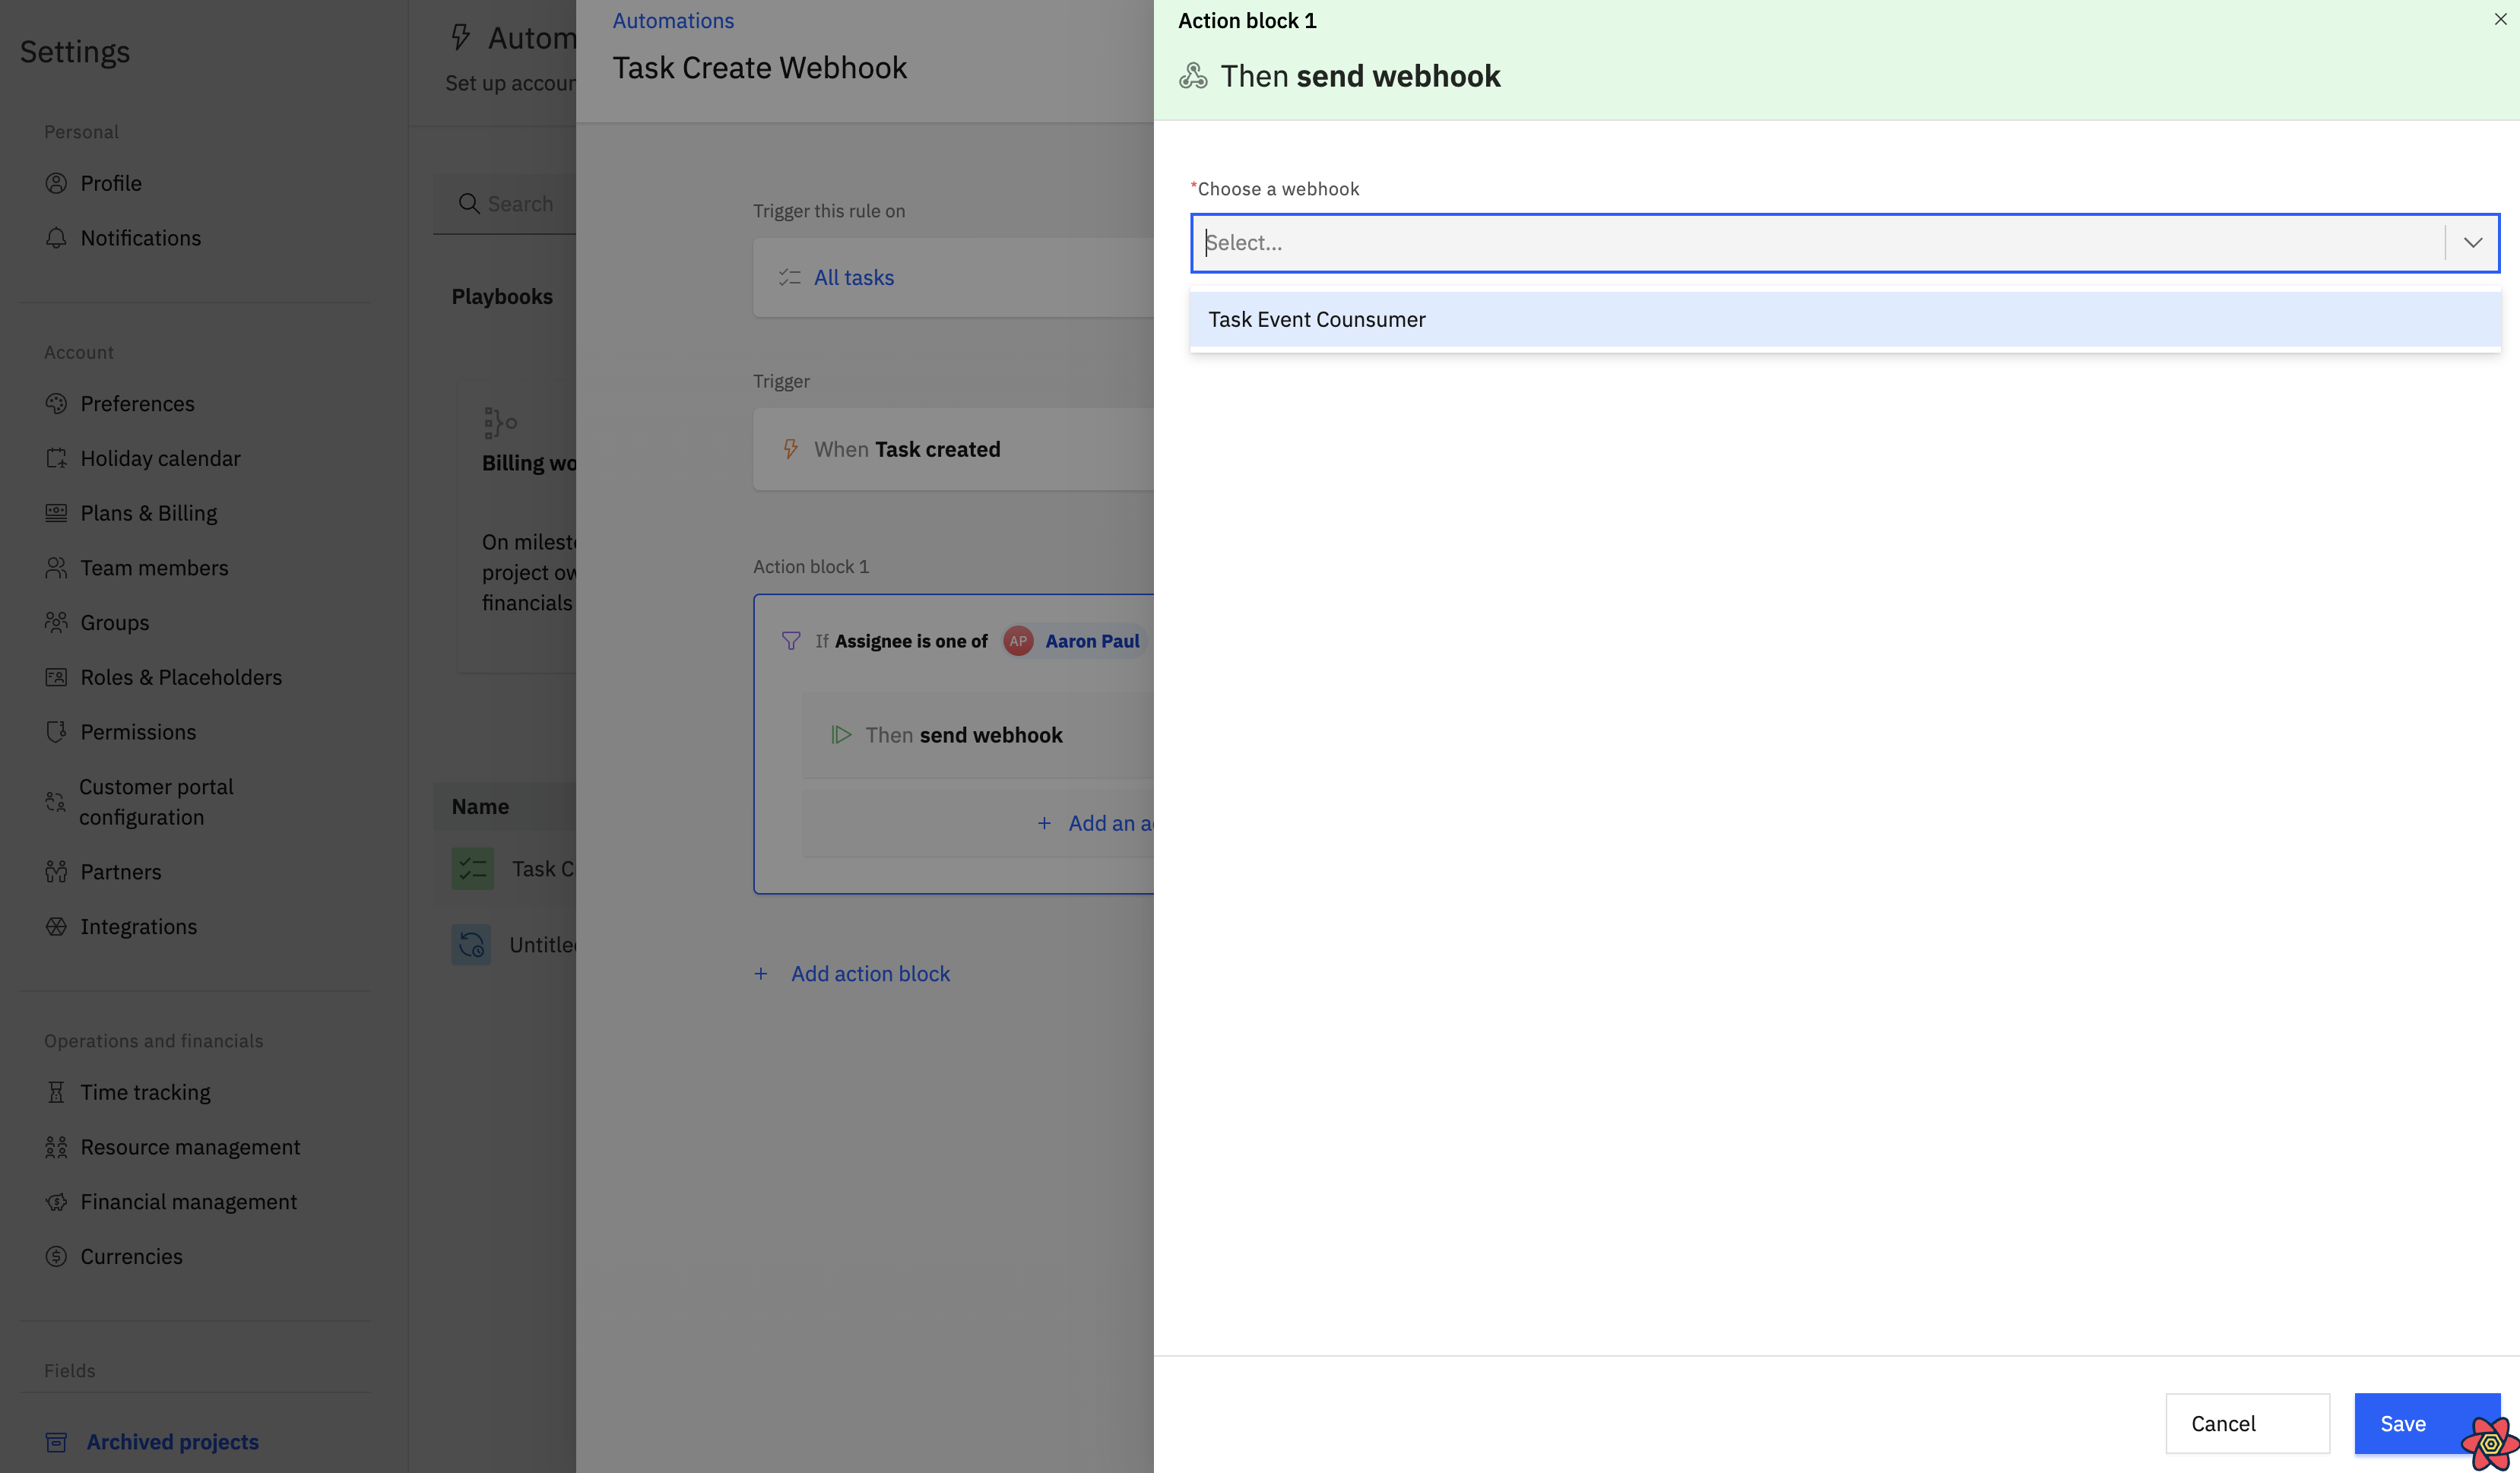
When you pick the webhook, a sample payload will be displayed. To preserve your webhook option, click the save button. To know more about payload, please refer Event Payload
-
Save and Test
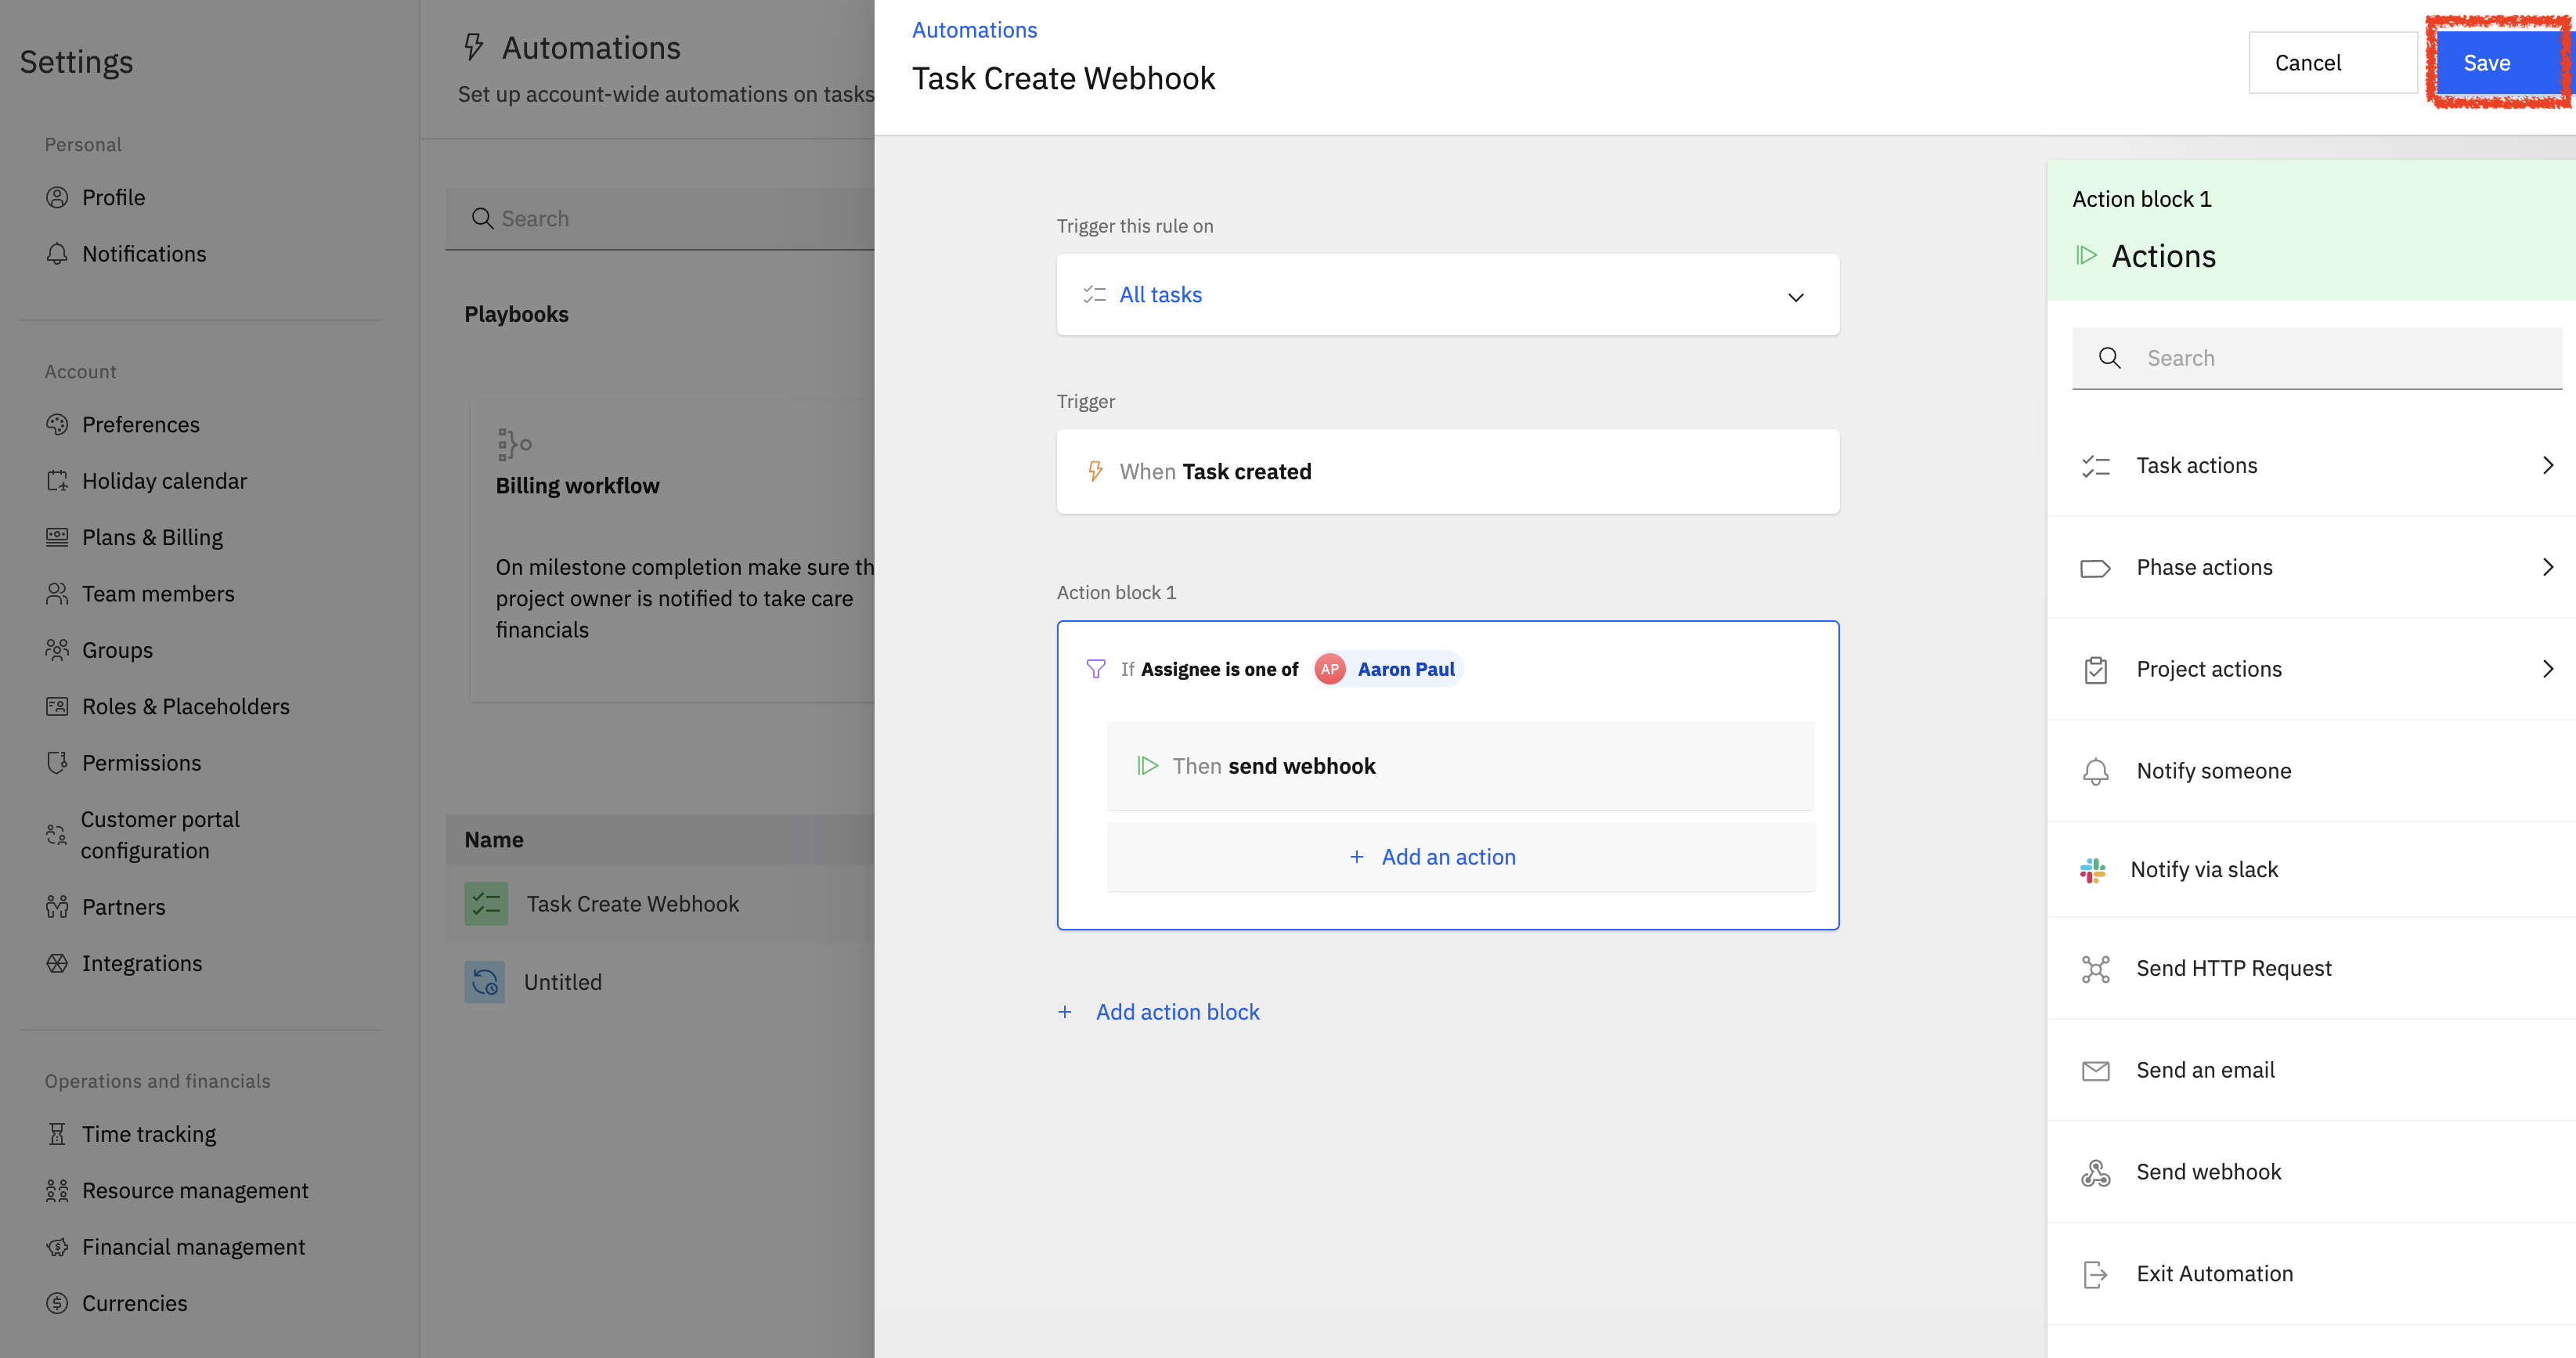
Save your webhook automation configuration. Test the webhook to see if the external system receives the expected data.
Updated 8 months ago